Silver feels different when you make it.
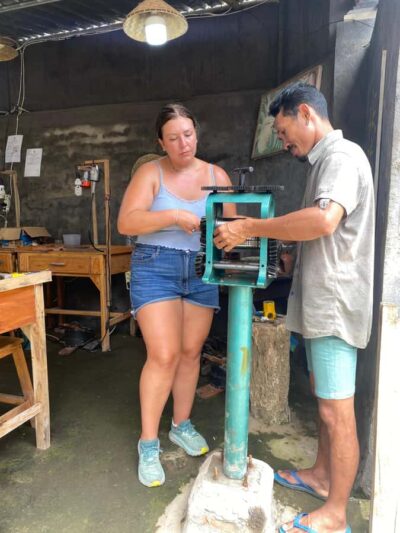
This Uluwatu-area workshop lets you design, melt, shape, solder, and polish your own silver jewelry with real silversmith help. I love the step-by-step hands-on process (from grains to shine), and I love that you walk away with a one-of-a-kind keepsake made by your own hands, starting around 1–5 grams of silver.
One heads-up: the instruction may be simpler than you expect. In at least one experience, the instructor’s English wasn’t strong, so you may get more results than explanation, which is fine if you’re okay following demonstrations.
In This Review
- Key highlights you’ll actually care about
- Why Uluwatu-area silver making fits a Bali holiday day
- Price and the real value of the 5-gram silver deal
- Getting to Garuda Silver Class in Ungasan (and planning your day)
- The 1.5 to 3 hour workshop: from design choice to polished metal
- 1) Choose your design (and set your expectations)
- 2) Learn tools and materials before the heat
- 3) Melting silver grains
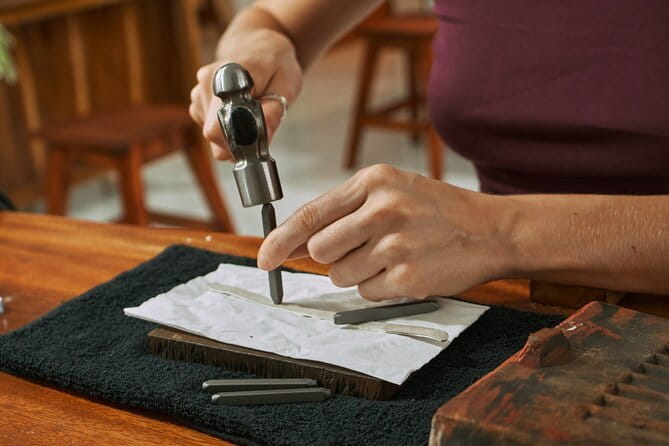
- 4) Forming wire or plate
- 5) Shaping and assembling
- 6) Sanding and polishing to bring out the shine
- The teacher factor: friendly guidance, with one note on communication
- What you take home: one piece, your design, and gemstone add-ons
- Where this workshop feels best (and who should book it)
- Should you book Uluwatu Silver Class?
- FAQ
- How much is Uluwatu Silver Class?
- How long does the class last?
- What’s included in the ticket price?
- Can I make more than one jewelry piece?
- How much silver can I take home?
- Are gemstones included?
- Is there a shuttle or pickup included?
- Where does the workshop meet?
- Is it a private class?
Key highlights you’ll actually care about
- You control the design: pick your piece and you’ll make it yourself, not a generic souvenir.
- Beginner-friendly pacing: the work is taught through multiple stages, from melting to polishing.
- Take-home silver is real: you keep your finished jewelry, starting 1–5 grams depending on your design.
- Private class setup: only your group participates, so you’re not rushed by strangers.
- Optional gemstone upgrades: add-ons are available at extra cost (IDR 100K–500K).
- Close to Uluwatu-area sights: you can pair the class with beach time and evening culture.
Why Uluwatu-area silver making fits a Bali holiday day
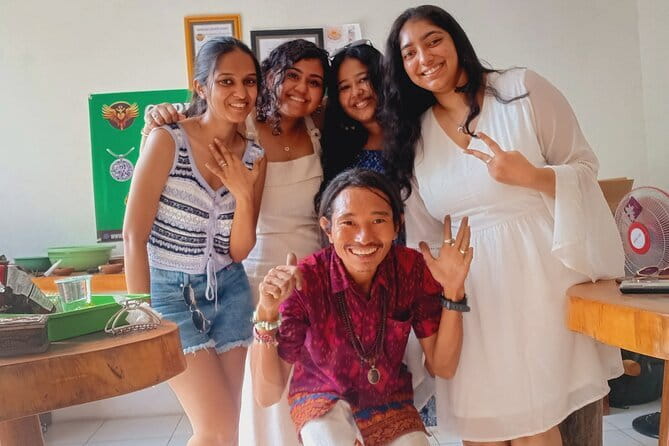
Bali days can run together fast. This activity gives you a focused, creative block where you’re doing something with your hands, not just moving from one photo spot to the next.
The workshop is in the Kuta/Ungasan area and is positioned near some very famous Uluwatu options. If you’re building a day around beaches like Balangan, Melasti, Pandawa, Nyang-Nyang, and Uluwatu Beach, this class is a logical fit before or between sightseeing. It’s also close enough to pair with the Garuda Wisnu Kencana Culture Park and the sunset Kecak Dance at Uluwatu, if your schedule is tight and you like efficient planning.
You can also read our reviews of more tours and experiences in Kuta.



Price and the real value of the 5-gram silver deal
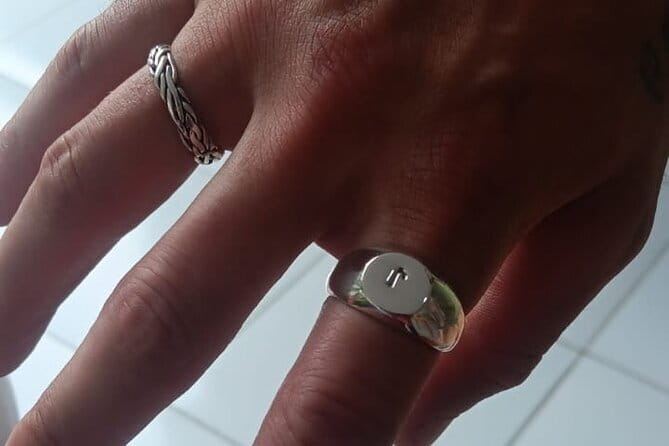
The price is $45.82 per person for a private class where you make one silver jewelry piece and take it home. That’s not just a ticket to watch someone else work. You’re paying for instruction, tools, materials, and the ability to walk away with a tangible keepsake.
Here’s the detail that matters: the class includes silver starting from 1–5 grams, but if your final piece ends up using less than 5 grams, the usage is still counted as 5 grams. In plain terms, you’re paying for the workshop’s silver allotment and the process, not trying to negotiate for ultra-light jewelry. If you’re aiming for maximum value, pick a design you’re comfortable finishing fully, not something tiny that you hope will “use less.”
Extra costs to budget for:
- Gemstones are optional and cost IDR 100K to 500K depending on type and size.
- If you go beyond the silver limit, there’s an additional fee of IDR 100,000 per gram for more than 5 grams.
If you want a souvenir that feels personal, this pricing structure makes sense. You’re not buying a finished piece at retail and hoping it matches your taste. You’re making something that’s literally yours.
Getting to Garuda Silver Class in Ungasan (and planning your day)
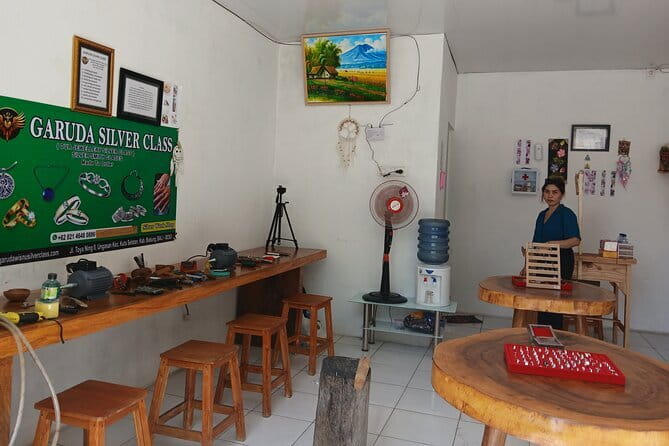
Your meeting point is Garuda Silver Class, Jl. Toya Ning II, Ungasan, Kec. Kuta Sel., Kabupaten Badung, Bali 80361, Indonesia. The session starts there and ends back at the same meeting point.
Two practical things help here:
- It’s described as being near public transportation, so you’re not locked into a private driver.
- There’s no shuttle included, so if you’re relying on pickup, you’ll need to arrange it separately.
Because you’re near popular beaches and cultural stops, I’d plan around ride time. You’ll likely want to schedule the workshop earlier in the day (or at least before a sunset performance), so you’re not rushing from molten-silver hands to late-evening traffic.
Also note: it’s a private tour/activity, meaning your group does the class together without blending into a larger crowd. That can make the experience feel calmer, and it often helps when you’re learning by watching.
The 1.5 to 3 hour workshop: from design choice to polished metal

The session runs about 1.5 to 3 hours. Each participant makes one piece. You’ll go through several stages, all taught by silversmiths, from planning to the final shine.
1) Choose your design (and set your expectations)
You start with design selection. This is where you decide what you’re making—commonly rings or bracelets in this style of workshop. You’ll also be guided on how your choice works with the silver process.
If you like keeping things simple, choose a design that fits your comfort level. You don’t need jewelry-making experience—just be ready to make decisions on shape and style, then follow the steps carefully.





2) Learn tools and materials before the heat
Before anything gets intense, you’ll get an introduction to materials and tools. This matters more than people think. Silver work involves temperature, forming methods, and finishing steps, and knowing what each stage is for helps you avoid frustration.
Even if your instructor’s English is basic, the physical demonstrations usually do a lot of the teaching.
3) Melting silver grains
Next is melting silver grains. This is the moment that makes the whole class feel real. It’s not a craft project where you skip the hard parts. You learn how the silver is handled before it becomes a workable form.
You don’t need to be brave in an action-movie way. You just need patience and to follow the instructor’s cues closely.
4) Forming wire or plate
After melting, the workshop shifts into shaping. Depending on your chosen design, you’ll form wire or plate. This stage is where your piece starts looking like jewelry instead of raw material.
If you want a smooth result, pay attention to how the silver is set up for the next steps. Small adjustments here can affect the final fit and finish.
5) Shaping and assembling
Then you shape the jewelry into its intended form. For many designs, this can involve getting proportions right and lining up components so everything fits naturally.
You’ll also do soldering—joining parts so they become one solid piece. This is one of those “watch closely and don’t rush” steps. The goal is a clean join that you won’t regret once you reach sanding.
6) Sanding and polishing to bring out the shine
After soldering, you’ll sand and polish the metal. This finishing step can make or break the look, because it changes how reflective the silver is and how smooth it feels.
This is also where you’ll notice your hands have learned the rhythm of the workshop. By the end, you’ll have a piece that looks like it belongs in a jewelry box, not a workshop bin.
The teacher factor: friendly guidance, with one note on communication
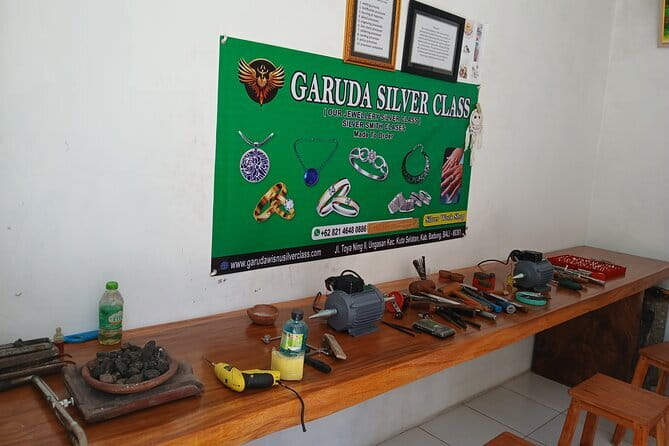
The strongest praise in the experience centers on the people teaching you. Expect friendly, patient instructors who guide you through each stage. In one example, making a ring was described as the highlight of the trip, with staff being both warm and effective teachers.
That friendliness matters because silver jewelry making can be unfamiliar. You’re learning heat, forming, joining, and finishing, and it’s reassuring when the guidance is practical and calm.
The only watch-out: instruction language quality can vary. In at least one experience, the instructor’s English wasn’t strong enough to clearly explain everything. If you’re sensitive to that, keep this in mind: you’ll still likely learn through demonstrations and hands-on correction, but you may not get detailed technical explanations during every step.
What you take home: one piece, your design, and gemstone add-ons
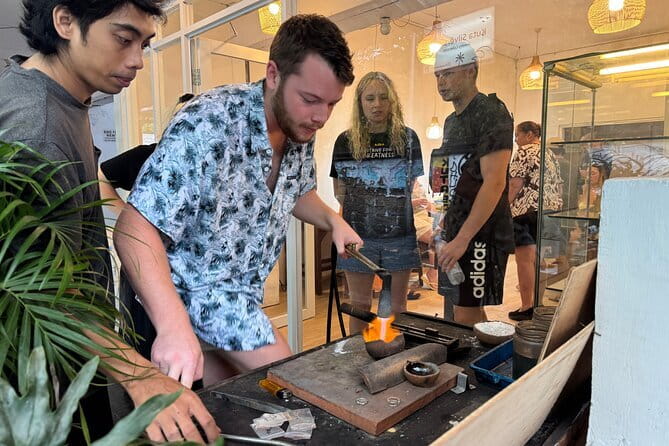
This workshop is built around a simple promise: your design and your jewelry are directly yours. No sharing silver with other participants. Each person makes one finished piece.
The silver weight is part of the deal:
- Included silver is 1–5 grams, depending on design.
- If the piece uses less than 5 grams, it’s still accounted for as 5 grams.
- If you exceed 5 grams, you pay extra at IDR 100,000 per gram.
Gemstones are optional. You can add them for IDR 100K to 500K, depending on the type and size. This can be a great way to tailor the final look, but it does add cost. If you’re trying to keep the total budget tight, treat gemstones as your upgrade choice, not a default.
Where this workshop feels best (and who should book it)
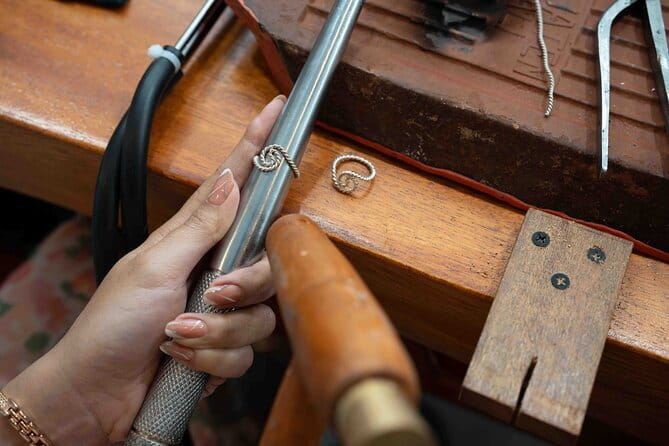
I think this fits best if you want:
- a memorable Bali activity that creates a wearable souvenir
- hands-on crafting with clear stages and guidance
- a break from long days of scooter rides and temple stops
It’s also a good option for couples or families because it’s private for your group. One experience noted a son making a second piece after enjoying the first, which suggests the workshop experience can build confidence quickly—though the basic rule is one piece per participant during the class.
Who might feel disappointed?
- If you want lots of spoken instruction in very fluent English, you might find the communication less detailed than you hoped. The demos still carry a lot of the learning.
- If you’re expecting a super social party atmosphere with lots of chit-chat, remember it’s focused craft time, not a nightlife tour.
Should you book Uluwatu Silver Class?
Yes—if you want a real souvenir and you like the idea of making something from raw material to polished metal in a single sitting. The combination of friendly teaching, true hands-on stages, and the fact that you keep your own one-of-a-kind silver piece makes it good value for the price.
Book it particularly when you’re already planning Uluwatu-side sightseeing. The workshop location makes it easier to connect with beaches and even a sunset cultural moment like Kecak Dance without turning your day into a logistical headache.
But if your top priority is detailed lecture-style instruction in English, go in with the right expectations: this is craft-first, demonstration-first. You’ll likely still end up with something beautiful and personal.
FAQ
How much is Uluwatu Silver Class?
It’s priced at $45.82 per person.
How long does the class last?
The class runs for about 1.5 hours to 3 hours.
What’s included in the ticket price?
You get all necessary materials and tools, plus snack, mineral water, and free Wi-Fi.
Can I make more than one jewelry piece?
No. Each participant can make only one silver jewelry piece.
How much silver can I take home?
You can take home a piece starting from 1–5 grams, depending on your design. If the silver used is less than 5 grams, it’s still accounted for as 5 grams.
Are gemstones included?
No. Gemstones are not included and cost extra, listed as IDR 100K to 500K, depending on type and size.
Is there a shuttle or pickup included?
No. The experience does not include shuttle.
Where does the workshop meet?
The meeting point is Garuda Silver Class, Jl. Toya Ning II, Ungasan, Kec. Kuta Sel., Kabupaten Badung, Bali 80361, Indonesia. The activity ends back at the meeting point.
Is it a private class?
Yes. It’s listed as a private tour/activity, so only your group participates.