Silver lessons in Kuta are hands-on and surprisingly fun. This class lets you learn silversmithing from Balinese craftsmen on Jalan Raya Legian, close to Kuta Beach, and create a one-of-a-kind sterling silver keepsake without heading to Ubud. I especially loved the patient, step-by-step coaching and the fact you actually do the exciting metalwork like melting and shaping. One thing to consider: if you want gemstones or extra silver weight, that can add cost.
The workshop runs with flexible start times and usually lands in the 1.5–3 hour range, so you can fit it around beach time and dinner. You’ll get tools, materials, snack, mineral water, and free Wi‑Fi, and the group stays small (max 22), which helps you get real attention.
In This Review
- Key Highlights I’d Put on Your Shortlist
- Where Jalan Raya Legian Makes This Feel Easy
- What You’ll Create: Sterling Silver Jewelry You Can Actually Wear
- The Hands-On Process: From Melt to Mirror Finish
- 1) Pick your design and plan your piece
- 2) Melt and prepare the sterling silver
- 3) Shape with traditional techniques
- 4) Solder and refine details
- 5) File and polish for the wearable finish
- Included Perks That Make the Class More Pleasant
- Price and Value: What $45.84 Gets You (and What Costs Extra)
- Included silver allowance
- Gemstones (optional)
- Extra silver weight
- No sharing silver
- Timing in Real Life: Plan for 1.5 to 3 Hours
- The Best Fit: Who Should Book This Class?
- What to Do Before You Go (So You Leave Happier)
- Should You Book the Kuta Bali Silver Jewelry Making Class?
- FAQ
- How long is the silver jewelry making class?
- Where does the class take place?
- What’s included in the price?
- Can I make more than one jewelry piece?
- Are gemstones included?
- Is there a limit on how much silver I can use?
- Does the price include a shuttle?
Key Highlights I’d Put on Your Shortlist
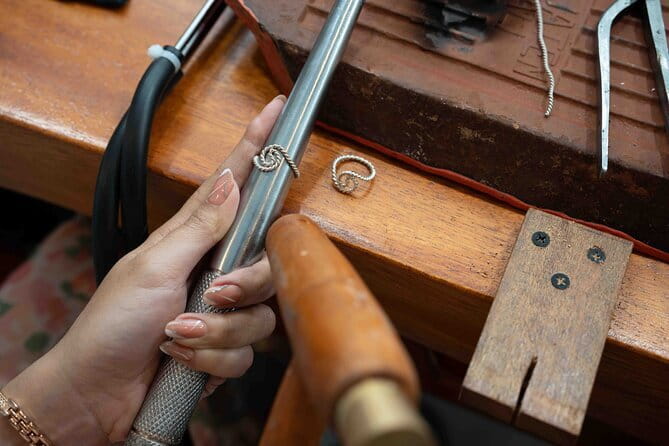
- You make the silver yourself: melting, hammering/pressing, soldering, shaping, then filing and polishing.
- One piece per person: you take home a finished jewelry item as your own souvenir.
- Beginner-friendly coaching: instructors give clear directions while letting you do the hands-on steps; Artie and Martie get named for helpful teaching.
- Near Kuta Beach: no Ubud detour, just walk-in-and-craft on Jalan Raya Legian.
- Budget clarity: the included allowance is up to 5 grams; extra silver and gemstones cost extra.
Where Jalan Raya Legian Makes This Feel Easy
Kuta can be a bit chaotic, but this class is refreshingly straightforward. The meeting point is on Jalan Raya Legian No.116, and it ends back at the same spot. That matters because you don’t have to plan a special trip deep into the island’s interior. You’re in Kuta, near public transportation, and close enough that you can tie it to a beach day without eating up your whole day.
I like experiences that don’t add stress, and this one doesn’t. You choose a start time that fits your schedule, then you’re in and focused on one goal: making jewelry you’ll actually wear (or at least keep where you’ll find it later).
You can also read our reviews of more tours and experiences in Kuta.



What You’ll Create: Sterling Silver Jewelry You Can Actually Wear
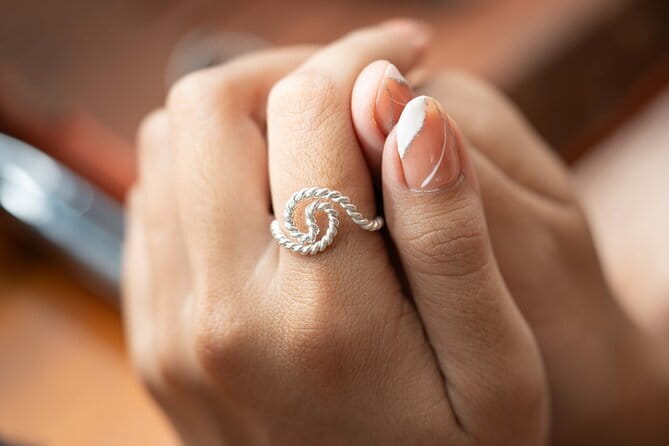
The headline promise is simple: make your own sterling silver jewelry piece. The class focuses on transforming 925 sterling silver, starting from melting the metal and ending with a polished finish you can be proud of.
You’ll start by selecting your design. From there, the workshop moves through the classic steps of silversmithing: preparing the silver, shaping it with traditional techniques (like hammering and pressing), refining with soldering and more shaping, then finishing with filing and polishing.
A key detail for your expectations: each participant can make only one jewelry piece. If you’re traveling as a couple or a group and you all want matching rings, each person needs a spot—silver can’t be shared between people.
Also, the class includes silver for a take-home piece starting at 1–5 grams (final weight depends on your design). If your piece comes out under 5 grams, it’s still accounted for as 5 grams. Translation: the price structure is designed around an allowance, not a tiny “pay exactly for every milligram” setup.
The Hands-On Process: From Melt to Mirror Finish
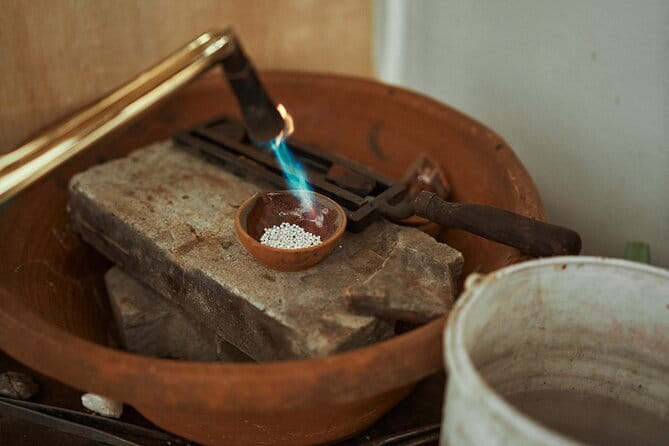
This is the part you’ll remember. Even if you’ve never touched metalworking before, the workshop is built so you move step-by-step, with skilled instructors guiding you while you do the core work.
Here’s the flow you can expect:
1) Pick your design and plan your piece
You begin by choosing what you want to make. That choice drives everything—how the silver is shaped, how much detail you can add, and what your final weight will likely be. In practice, this is where you can set yourself up for success: pick something that matches your confidence level and the time window you have.
2) Melt and prepare the sterling silver
The process starts with melting pure sterling silver (925). This is where the workshop earns its keep as a real craft class and not just a souvenir factory. You’re learning how the metal becomes workable.






3) Shape with traditional techniques
Next comes hammering and pressing—classic moves in silversmithing that give the metal its structure. This is also where you start to see your design take physical form instead of staying an idea on a table.
4) Solder and refine details
Soldering is part of the workflow to help pieces come together cleanly, and then shaping continues so the final item matches what you set out to create.
5) File and polish for the wearable finish
The ending steps are filing and polishing, which turn rougher metal into a smooth, shiny surface. This finishing stage is often what separates “I made something” from “I made something I actually want to put on.”
If you’re curious about what this looks like in real life, the strongest signals from past participants are consistent: people mention getting guided through the process but still doing the memorable parts like melting, bending, engraving, and polishing. And yes, that’s where you’ll likely start smiling, because suddenly it feels like your ring rather than a class project.
Included Perks That Make the Class More Pleasant

This workshop isn’t just tools and silver—it’s also small comfort items that make the experience easier to enjoy.
You’re provided with:
- All necessary materials and tools
- Snack and mineral water
- Free Wi‑Fi
The Wi‑Fi is handy because you can share photos right away and not have to wait until you’re back on the beach. The snack and water matter more than you’d think when you’re working with concentration for an hour or two.
Price and Value: What $45.84 Gets You (and What Costs Extra)

At $45.84 per person, this class is priced like a craft session plus a take-home souvenir. The real value is that you’re not paying for a finished product—you’re paying for the chance to make a sterling silver piece yourself using real tools and real techniques.
That said, you should go in with a clear sense of how the allowance and add-ons work:
Included silver allowance
You can take home your piece with weight starting at 1–5 grams (with final weight depending on your design). If your piece ends up less than 5 grams, it’s still accounted for as 5 grams.
Gemstones (optional)
If you want gemstones in your design, you can buy them on the day. Pricing varies by type and size, listed as IDR 100K to 500K.
Extra silver weight
If you go beyond the 5-gram limit, there’s an additional fee of 85,000 IDR per gram for more than 5 grams.
No sharing silver
You can’t share silver with other people. So if you’re thinking of splitting an allowance between friends, plan on each person booking their own seat.
My practical take: If you want a simple ring you’ll wear often, stick close to the default silver allowance. If you want an amethyst-style look or a heavier statement piece, budget for the extras up front so there’s no surprise at the end.
Timing in Real Life: Plan for 1.5 to 3 Hours
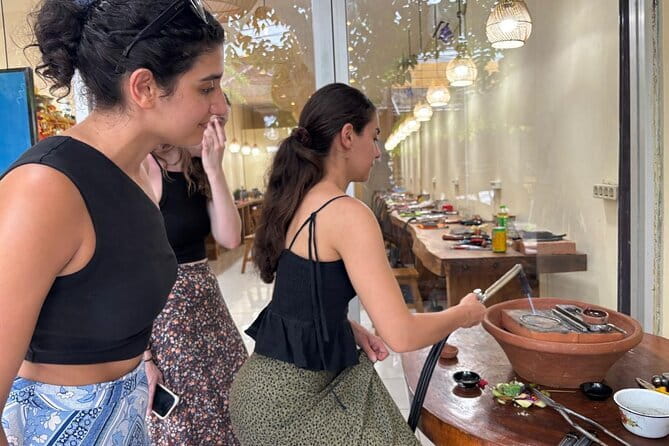
The class duration is listed as about 3 hours, but it’s also described as 1.5 to 3 hours depending on how everything progresses. In real terms, it means you’re dealing with a flexible window rather than a strict timetable.
You also get a wide choice of start times, which is great in Kuta. If your day is packed—beach, shopping, sunset plans—you can pick a slot that doesn’t force you to lose your whole afternoon.
Also, you’ll be making one piece, so you’re not stuck waiting for multiple items to finish. The workshop is built to get you from metal to a finished keepsake within that window.
The Best Fit: Who Should Book This Class?

This is a great match if you want:
- A hands-on activity that’s different from typical Bali tours
- A souvenir that feels personal and wearable
- A beginner-friendly way to learn real steps of silversmithing
It’s also a solid pick if you like structure. The workshop includes clear guidance and patient help, and past participants repeatedly highlight tutors who take time to perfect what you’re making.
If you’re unsure, here’s a simple decision rule:
- If you like the idea of making something with your hands and wearing it later, book this.
- If you only want a quick photo op or a passive demo, this may feel like effort—you’ll be working.
What to Do Before You Go (So You Leave Happier)
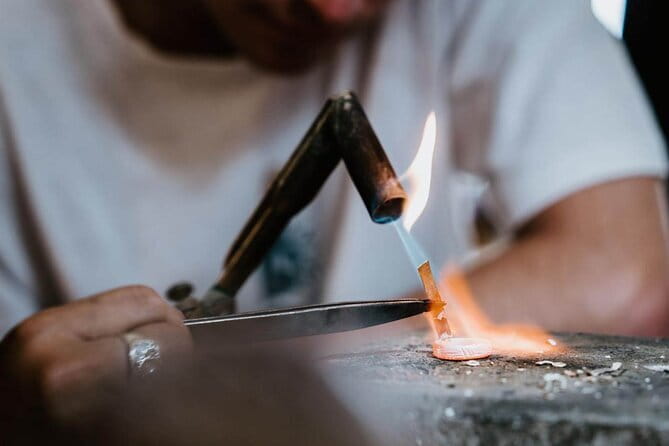
You can’t control everything in a craft class, but you can control your choices.
- Decide on your design level: If it’s your first time, a simpler ring or pendant plan usually helps you finish in a strong place.
- Think about gemstones early: You can buy them on the day, but knowing whether you want them helps you budget and helps the instructor guide you on a design that fits the material.
- Plan your time block: Since it can run up to 3 hours, schedule your next stop (dinner or drinks) with some breathing room.
And one more practical note: you’ll likely get a bit of metal dust and polishing mess around. You might want to wear clothes that can handle craft work and don’t mind a quick change afterward.
Should You Book the Kuta Bali Silver Jewelry Making Class?
I think you should book it if you want a genuine, hands-on Bali souvenir that isn’t just bought—it’s made. The location is convenient (near Kuta Beach on Jalan Raya Legian), the class is taught with patient, step-by-step guidance, and you take home a finished sterling silver piece of your own design.
I’d hesitate only if your budget is tight for add-ons. Gemstones and extra silver weight cost extra, and you can’t share silver between participants, so group plans need to be booked per person.
If that all sounds fine, this is one of those experiences that leaves you with a memory you can wear—literally.
FAQ
How long is the silver jewelry making class?
The class duration is listed as about 3 hours, and it can run between 1.5 and 3 hours.
Where does the class take place?
The meeting point is on STREET Jl. Raya Legian No.116, Kuta, Bali 80361, and the activity ends back at the meeting point.
What’s included in the price?
The class includes all necessary materials and tools, snack, mineral water, free Wi‑Fi, and silver for a take-home piece starting from 1–5 grams depending on your design.
Can I make more than one jewelry piece?
No. Each participant can make only one silver jewelry piece.
Are gemstones included?
Gemstones are not included. If you want them, you can buy gemstones on the day, with pricing listed as IDR 100K to 500K depending on type and size.
Is there a limit on how much silver I can use?
Yes. The included allowance is tied to a 1–5 gram range. If your piece uses more than 5 grams, there is an additional fee of 85,000 IDR per gram for more than 5 grams.
Does the price include a shuttle?
No. Shuttle service is not included.