Batik starts with wax and patience. At Abhati Studio in Yogyakarta, you get hands-on batik training and then see how natural dyes bring the pattern to life.
I love how friendly and calm the instruction is, especially in a small group of up to 10. I also like that you take home a real souvenir fabric (not just photos), sized at 25 x 25 cm. One thing to consider: the studio sits in a small alley, so arriving by car or taxi means a short walk from the parking area.
You’ll likely get the most out of this if you’re comfortable with clothes that might get stained. Batik and dye are part science, part art, and you’ll be working close up with tools and color. A little planning helps, since your session runs about 2 to 3 hours and the studio is in the heart of Yogyakarta.
In This Review
- Key points before you go
- Entering the Batik Workshop: Where You Start and How It Feels
- Choosing Your Pattern: Classic Motifs or Your Own Idea
- Wax-Resist Basics: Turning Lines into a Resist Map
- Natural Dyeing: The Part Where Color Actually Shows Up
- Taking Home Your Batik and Memories (Yes, You’ll Have Photos)
- Price and Value: Is $13 Worth It?
- Logistics That Matter: Timing, Group Size, and What to Wear
- Who Should Book This Workshop (and Who Might Skip It)
- Should You Book Abhati Studio’s Batik and Natural Dyeing?
- FAQ
- How long is the batik workshop?
- How much does it cost?
- What’s included in the workshop fee?
- Are meals included?
- Can I choose a batik design, or do I have to make my own?
- Where is the meeting point and how do I get there?
- What should I bring?
- Is the workshop wheelchair accessible?
- Is the workshop suitable for young children?
Key points before you go
- Small group, home-studio feel with up to 10 participants, so you’re not stuck watching from the sidelines
- Hands-on batik basics of the wax-resist technique, from pattern planning to dyeing
- Natural dyeing experience tied to their mission of conserving culture and protecting the environment
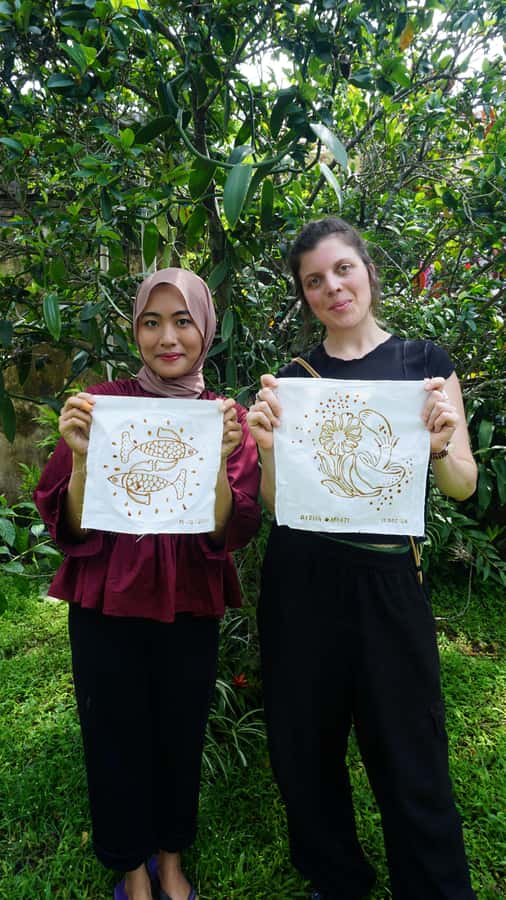
- You get supplies and a cotton piece (25 x 25 cm) so you can focus on making, not shopping
- Take-home results plus photo documentation, so you leave with something you can actually show off
- Parking/walking reality near the studio entrance can be a consideration if you’re coming by car
Entering the Batik Workshop: Where You Start and How It Feels
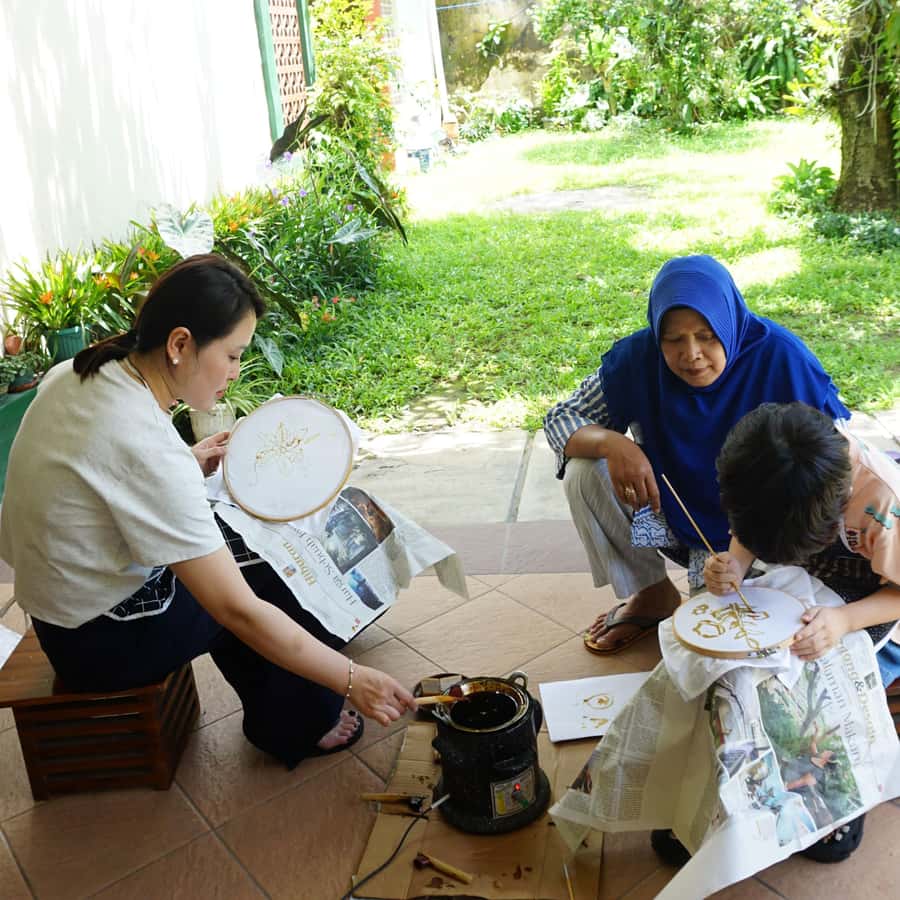
The experience begins in a home studio atmosphere, not a big classroom. You’ll head to a studio tucked into a small alley in central Yogyakarta, about a 15-minute drive (around 4.5 km) from Malioboro street. Kotagede heritage sites are roughly a 10-minute drive away.
The vibe is noticeably relaxed. Several details point to a calm setup: small group size, a peaceful pace, and a studio environment described as filled with greenery. It matters because batik is easier when you can concentrate without feeling rushed.
Before you make anything, you’ll get a welcome drink. After that, your kit is ready: a piece of cotton fabric (25 x 25 cm), plus the tools and materials needed for the workshop. This is a great value touch, because it means you’re not trying to figure out what you need while also learning a wax-resist craft.
One practical note: the meeting point is a small alley. If you arrive by motorbike, you can drop or park in front of the studio. If you arrive by car or taxi, you’ll park in a designated area and walk about 140 meters. That walk isn’t long, but it’s enough that wearing comfortable shoes pays off.
You can also read our reviews of more tours and experiences in Yogyakarta.



Choosing Your Pattern: Classic Motifs or Your Own Idea
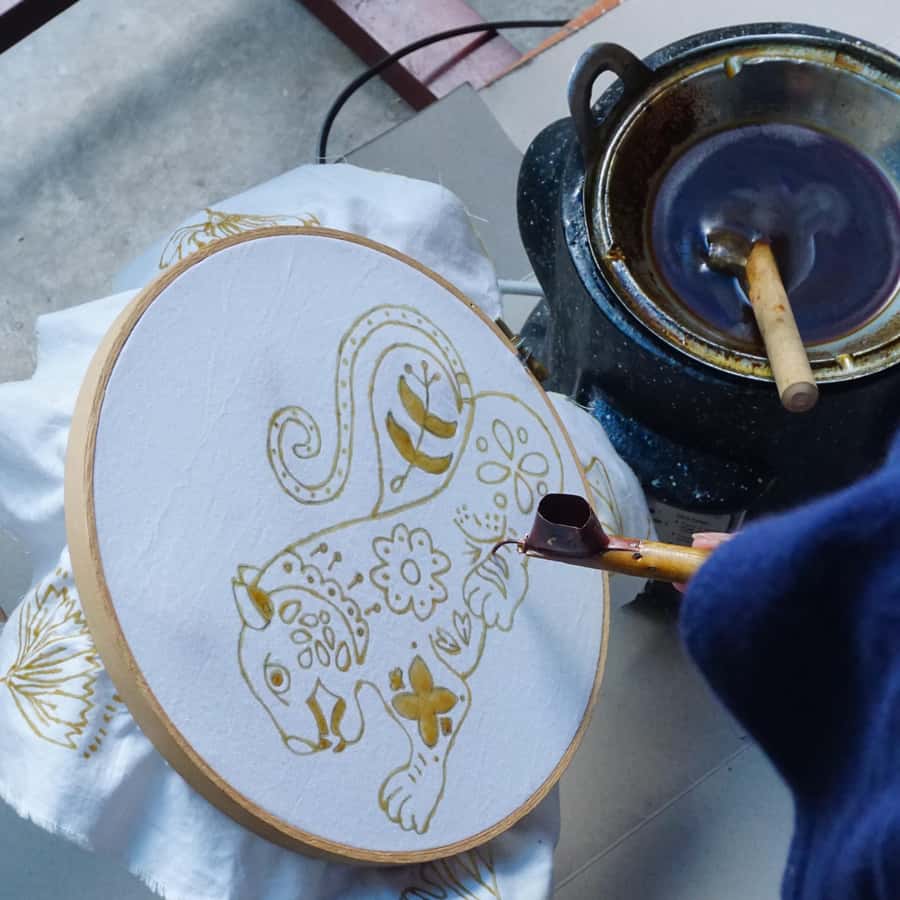
One of the most useful parts of the session is that you’re given options. You can pick from a selection of classic and contemporary batik designs, or you can create your own pattern.
If you’re the type who wants to make something meaningful, designing your own is the best route. The workshop format is designed for you to make decisions during the session, not after. If you’re less confident at freehand art, choosing a ready design can keep you moving fast while still giving you a sense of authorship.
This is where the instruction style really matters. In past sessions with instructors such as Belinda and her mom, the teaching approach is described as patient and step-by-step. You don’t just get told what to do; you get guidance on what you’re doing and why, which helps you avoid the most common beginner mistakes.
A nice bonus: because the workshop is only 2 to 3 hours, you’re not stuck planning for days. You work through the key phases during the session, and then you take your finished piece home.
Wax-Resist Basics: Turning Lines into a Resist Map
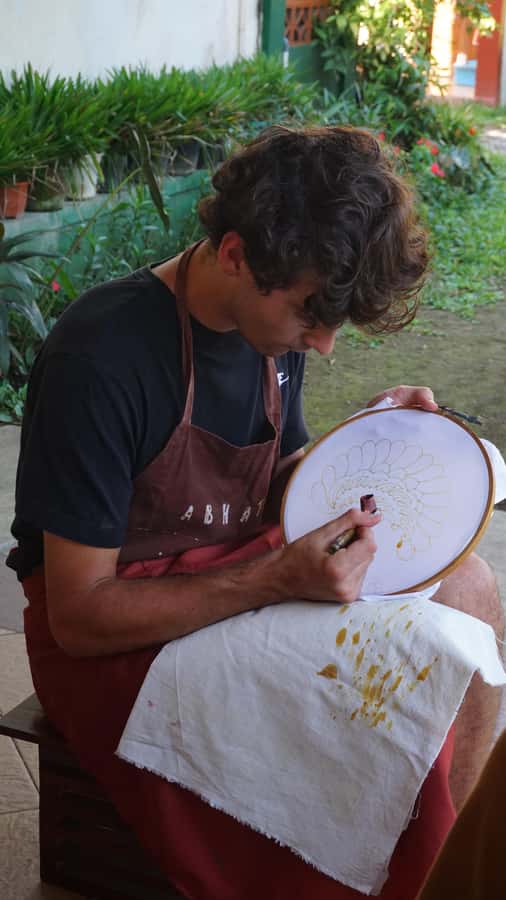
Batik is built on wax-resist technique. The core idea is simple: you apply wax to parts of the fabric that you want to keep from taking dye. Once the wax is in place, dyeing becomes your controlled coloring process, because waxed areas resist the color.
In the workshop, you learn the basics of this ancient process hands-on. You’ll work with the tools and materials provided and follow the instructor’s guidance through the steps. Expect to spend real time applying pattern work and understanding how your design interacts with dye later.
What I like about teaching this way is that you’re not just making something pretty. You’re learning a craft logic. When you understand resist, you start predicting outcomes instead of hoping for them. That makes the final fabric feel more personal, because the pattern isn’t random. It’s yours, and it behaves the way you intended.
Also, beginners often worry that they’ll mess everything up. The small group format helps. With fewer people in the studio, you can get help when you need it, instead of waiting in a queue. That’s especially important for wax work, where small technique differences can affect the final result.
Natural Dyeing: The Part Where Color Actually Shows Up
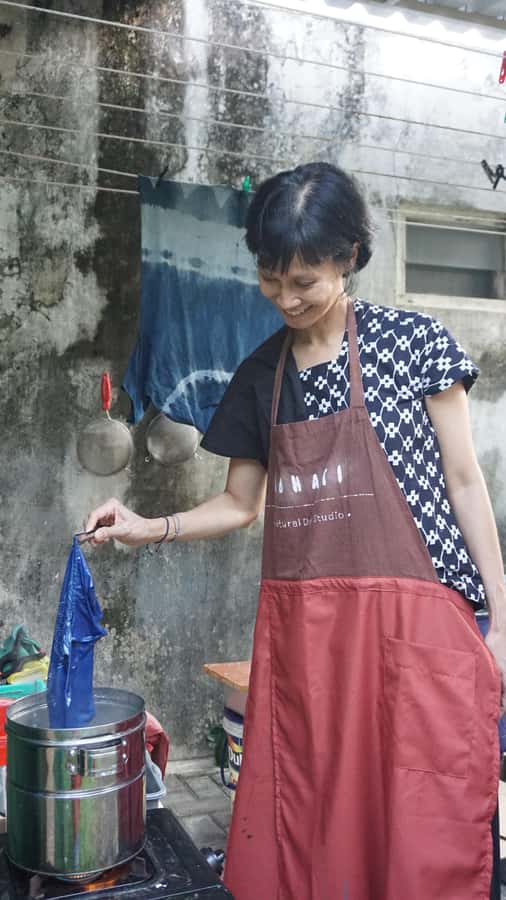
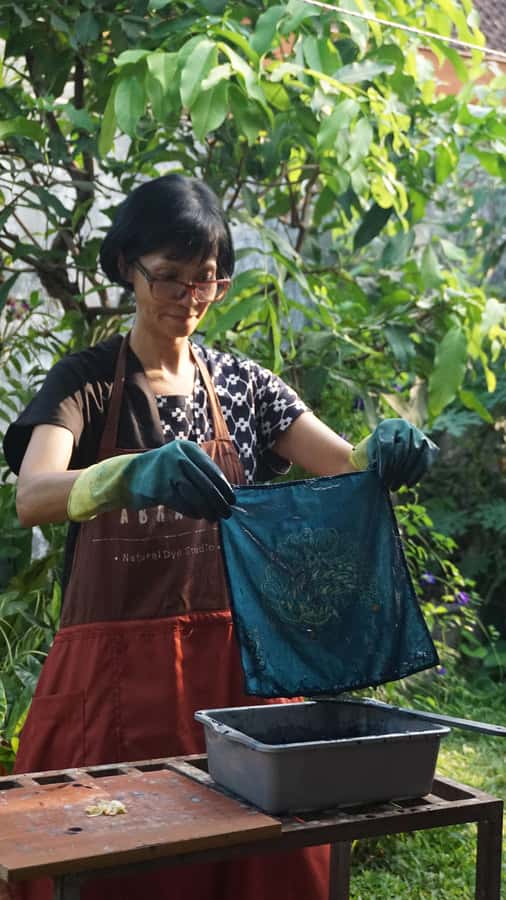
After the resist work, the magic shifts to natural dyeing. This part is the hands-on connection to nature that the workshop highlights. You’re no longer working only with lines and tools—you’re watching how the dye develops across your fabric.
The point isn’t just to get colored fabric. It’s to learn how the wax-resist approach shapes the final pattern. That cause-and-effect is what turns batik into more than a souvenir factory.
The studio’s mission also comes through here. They specifically frame natural dyeing as part of conserving culture while preserving the environment. Even if you’re not thinking about sustainability at the start, the session design nudges you to notice the materials and process choices that align with that goal.
In a few sessions, you might also get traditional snacks and fruit during the experience. That’s not listed as a meal, but it adds to the feeling of being hosted rather than processed. Since meals are not included, snack time can help you stay comfortable through a 2 to 3 hour workshop without needing lunch beforehand.
Taking Home Your Batik and Memories (Yes, You’ll Have Photos)
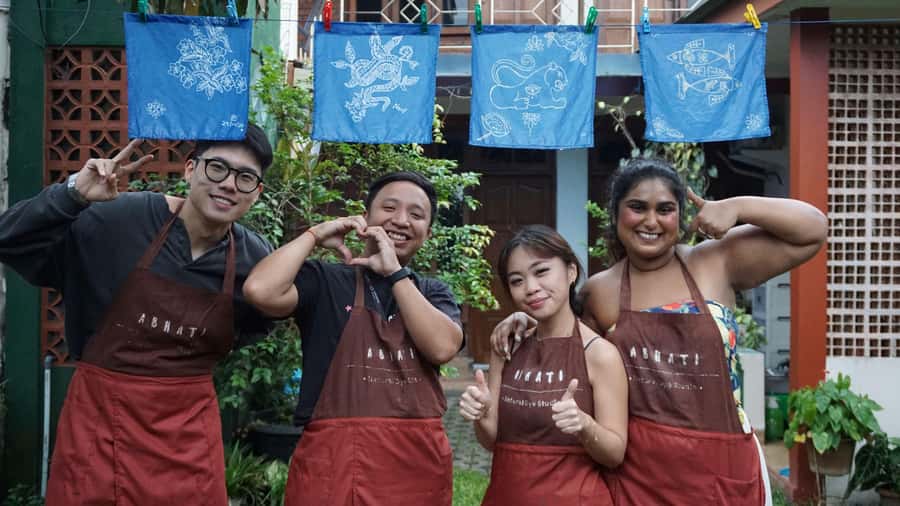
At the end of the session, you take home your batik masterpiece. The included fabric is 25 x 25 cm, which is a manageable size for a wearable piece later, a wall hanging, or a framed memento. It’s big enough to appreciate the pattern when you’re back home.
You also receive photo documentation. That matters for two reasons. First, batik’s process is hands-on and easy to lose track of mid-session. Second, you’ll want proof of how the piece looked before it was finished—especially if you chose your own contemporary design.
There’s also something emotionally satisfying about leaving with an item you made. Yogyakarta is full of shopping opportunities. This is one where the value comes from the time you put into it, not just the final product.



Price and Value: Is $13 Worth It?
At $13 per person, the workshop is priced like a great local craft experience rather than a pricey tourist activity. The value comes from what’s included, not only the number.
You’re covered for:
- Welcome drink
- Cotton fabric (25 x 25 cm)
- All necessary tools and materials
- Classic and contemporary design options
- Your batik masterpiece to take home
- Photo documentation
That’s a lot for a short session. In most situations, the biggest hidden cost in craft workshops is the material kit and instruction time. Here, your payment already includes the supplies and the guidance that makes it possible for beginners to finish a real piece during the same sitting.
The only clear extra cost is transportation to and from the studio and meals (meals are not included). So if you’re staying near the Malioboro/Kotagede area or you’re already planning a ride into central Yogyakarta, it becomes even better value. If you’re far out, factor in how you’ll get there and back.
Logistics That Matter: Timing, Group Size, and What to Wear
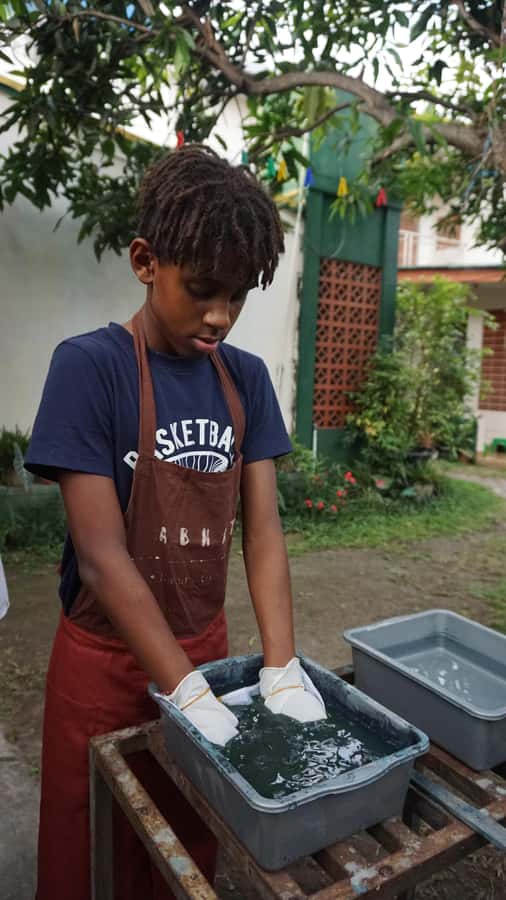
The session runs 2 to 3 hours, depending on timing and starting slots. That range is common for batik beginners because wax and dye work needs careful handling. You don’t want to book this right before a long travel day with tight transfers.
Group size is limited to 10 participants. That small number changes the whole experience. You get more attention, your questions are easier to answer, and the pace stays relaxed instead of chaotic.
Language support is also practical: the instructor speaks Indonesian and English. If you’re comfortable in basic English, you can follow the key steps well. And even if you’re not fluent, the process is visual, which helps.
What to bring is simple: wear comfortable clothes and plan for them to get dirty. Batik and dye are hands-on. If you’re wearing your nicest outfit, you’ll spend the whole session worrying instead of making.
One more fit detail: it’s not suitable for children under 5. If you’re traveling with younger kids, you may want to choose a different activity.
Accessibility is listed as wheelchair accessible, but the exact layout isn’t described. If accessibility is a priority for your group, it’s worth checking ahead about how the space works for your specific needs.
Who Should Book This Workshop (and Who Might Skip It)
This workshop is a strong match if you want a hands-on cultural craft in Yogyakarta that feels personal. You’ll likely enjoy it if you:
- like learning by doing, not just watching
- want a creative souvenir you made yourself
- enjoy calm, small-group experiences rather than crowded classes
- are interested in how natural dyeing connects to culture and environment
It may be less ideal if you:
- dislike getting messy with textile work
- need a very fast activity with zero waiting time
- are trying to pack it into an ultra-tight schedule with lots of switching transportation
The setting is also a good clue. Because it’s hosted in a home studio environment with greenery, the tone tends to be peaceful. If you’re seeking a loud, nightlife-like activity, this isn’t that.
Should You Book Abhati Studio’s Batik and Natural Dyeing?
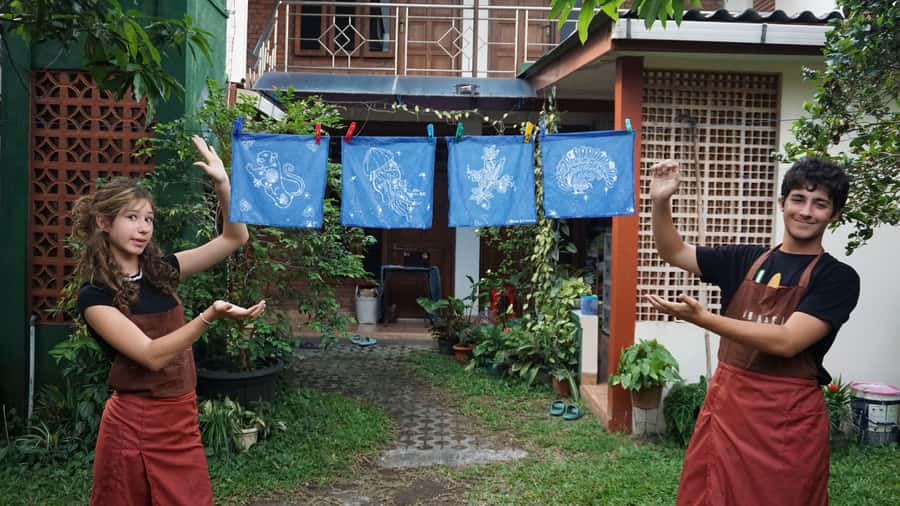
If you want a meaningful Yogyakarta souvenir and you’re curious about the craft logic behind batik, I’d book this. The combination of wax-resist basics, natural dyeing, and a small-group home setting makes the learning feel grounded, not rushed. At $13, you’re paying for instruction and materials in a way that feels fair.
Book it especially if you like the idea of choosing a classic motif or making something more contemporary and personal. The step-by-step, patient teaching style (including instructors like Belinda and support from her family) is a big reason people leave happy.
Only hesitate if you strongly prefer dry, clean, low-contact activities—or if the 140-meter walk to the studio from parking sounds annoying for your day. With the right clothes and planning, though, this is exactly the kind of workshop that turns culture into something you can hold in your hands.
FAQ
How long is the batik workshop?
It lasts about 2 to 3 hours.
How much does it cost?
The price is $13 per person.
What’s included in the workshop fee?
You get a welcome drink, a cotton fabric piece (25 x 25 cm), all necessary tools and materials, design options, your finished batik to take home, and photo documentation.
Are meals included?
No, meals are not included.
Can I choose a batik design, or do I have to make my own?
You can choose from classic and contemporary batik designs or make your own.
Where is the meeting point and how do I get there?
The studio is in a small alley in central Yogyakarta. Motorbikes can park/drop off in front. Cars or taxis must park in a designated area, and you walk about 140 meters.
What should I bring?
Wear comfortable clothes and clothes that can get dirty.
Is the workshop wheelchair accessible?
Yes, it is listed as wheelchair accessible.
Is the workshop suitable for young children?
It is not suitable for children under 5 years.