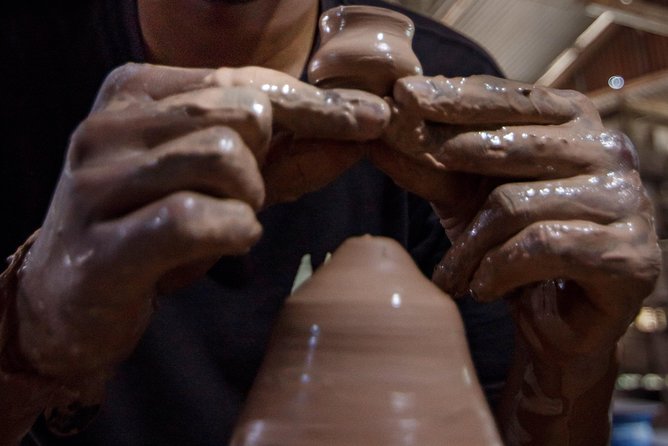
Your hands shape clay on a real wheel. This 3-hour ceramic class in Ubud focuses on practical skills you can actually use at the wheel: scaling and kneading clay, learning basic wheel machine know-how, and forming pieces through hand technique and balancing. I especially like the hands-on wheel throwing time and the factory setting, where you can see the tools and machinery used in daily pottery work.
The one big consideration is the finish. In-class you’ll make and decorate up to your best 3 pieces, but full glazing and firing is handled separately and takes 1 to 4 weeks, and combustion for the final product isn’t included in the base price.
In This Review
- Key things to know before you go
- What You Really Learn in 3 Hours of Wheel Throwing
- The Factory Setting in Sukawati: Tools You Can Actually See
- Clay Prep and the Wheel Machine: What the Class Flow Looks Like
- Choosing Your Best 3 Pieces (and What You’ll Finish in Class)
- Glazing and Firing: The Waiting Game (1 to 4 Weeks)
- Price and Value: Why $50 Can Be a Great Deal (If You Plan for the Finish)
- Logistics That Matter: Where to Meet and What to Bring
- Who Should Book This Wheel Throwing Class in Ubud?
- Tips for Booking and Showing Up Prepared
- Should You Book This Wheel Throwing Class in Ubud?
- FAQ
- How long is the wheel throwing class?
- Where is the meeting point?
- What’s included in the $50 price?
- Can I choose more than one piece to bring home?
- Is glazing and baking included during the class?
- What happens if the weather is bad or I need to cancel?
Key things to know before you go
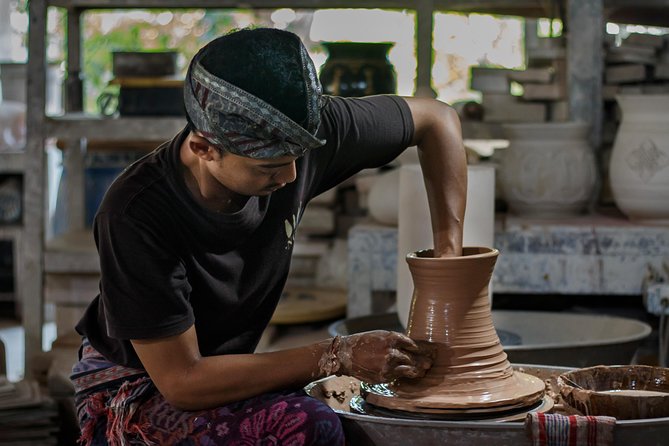
- 3 hours of guided wheel throwing: you’ll learn machine basics plus the hand skills for centering and forming.
- Clay quantity and output limits: you experiment with the provided clay (up to 3 kg total), then choose your best 3 to keep.
- Materials and setup are included: apron, bottled water, and the clay plus coloring materials if you want variations.
- Firing and glaze are not instant: plan around the 1–4 week timeline for combustion/glazing support.
- Private group experience: only your group participates, which usually means you can ask more questions at the wheel.
- No lunch or transport: bring your own plan for meals and get ready to cover private transport if needed.
What You Really Learn in 3 Hours of Wheel Throwing
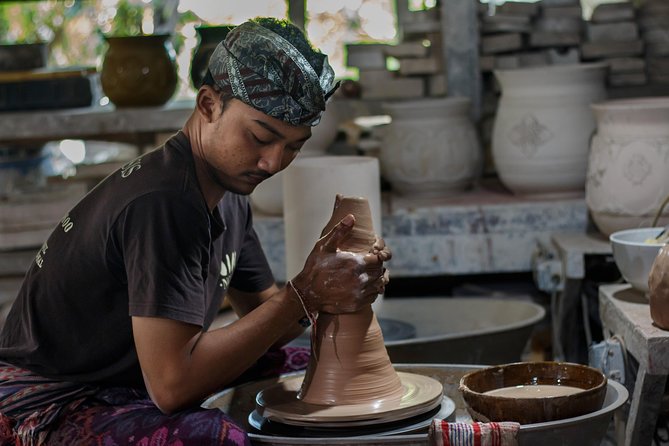
This class is built for beginners who want more than watching someone else work. The session starts with clay prep—scaling and kneading—because that’s the foundation for smooth wheel throwing. If the clay isn’t conditioned right, everything that comes after gets harder, so this part matters more than it sounds.
From there, you move to the wheel throwing machine and learn the basic machine knowledge you need to work safely and confidently. The goal isn’t “perfect pottery.” It’s learning the control points: how to steady your hands, how to balance pressure, and how to coax the clay into the shape you want. You’ll create pieces by using the wheel plus a hand technique that helps you shape and refine.
The practical win: by the end, you’re not just holding a finished item. You understand the steps. That makes it a more useful souvenir than a store-bought ceramic.
You can also read our reviews of more tours and experiences in Ubud.



The Factory Setting in Sukawati: Tools You Can Actually See
One of the underrated parts here is the location. The class happens in the provider’s own factory, so you’re not in a neat little studio with the messy work hidden behind a curtain. You can see the tools, materials, and machinery that support their day-to-day pottery business.
Why that matters for you: it makes the process feel real. Wheel throwing can look mysterious from a distance, but seeing the environment around it helps you connect the dots—why certain steps are done in a certain order and how the workflow moves from clay prep to shaping to finishing.
It also helps with expectations. If you’re the type who wants to know how a craft is done beyond the final object, the factory feel is a plus.
Clay Prep and the Wheel Machine: What the Class Flow Looks Like
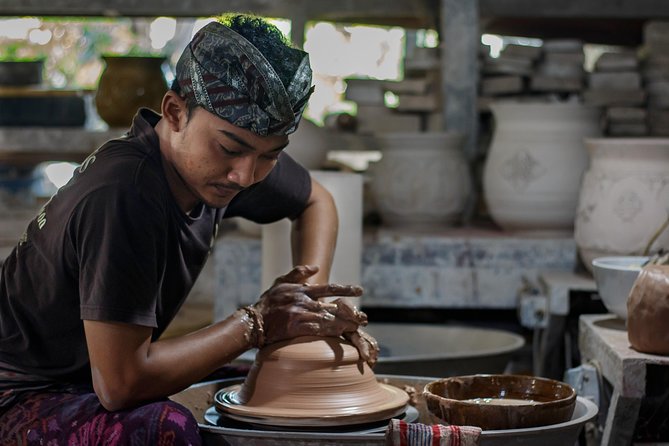
Here’s how the work time is structured in plain terms.
First comes clay conditioning. You’ll learn the basics of scaling and kneading the clay so it’s ready for throwing. Then you’ll get time at the wheel throwing machine with guidance on how to use it and how to keep the form steady while the wheel turns.
A key detail is the role of hand technique. The class isn’t just “sit at the wheel and spin.” You’re taught balancing and forming approaches that work with the wheel, so you can shape your ceramic the way you want—within the beginner-friendly constraints of a short session.
You’ll experiment with a portion of clay during the session (the information you’re given points to around 2,000 grams as a starting reference), and you’re also told you’ll experiment with a total supply of clay (up to 3 kg). In practice, this means you’ll likely have enough material to try a few attempts, not just one.
Also note: you can make multiple shapes during the class, but only the best pieces are kept for the final take-home.
Choosing Your Best 3 Pieces (and What You’ll Finish in Class)
This is not a “make one mug and leave” situation. You’ll be able to create more than one piece during the workshop, and you’ll select the best three to take home. That limit is a good match for the reality of ceramic making: shaping and finishing takes focus, and there’s a timeline for processing after the class.
In the session, you’ll work on your chosen pieces through the basic ceramic steps and any coloring materials you decide to use. If you want variations, the class provides coloring options during the session, so you can experiment while you still have hands-on control.
One more expectation to set: teachers guide the process. In a short 3-hour window, some instruction can mean the teacher helps at key moments to keep things on track. If you want maximum independent control, ask questions early and tell them you want to do as much of the shaping as possible. That way you get the learning payoff, not just the result.
What you take home right away depends on how your final firing/glazing is handled, which leads to the next important topic.
Glazing and Firing: The Waiting Game (1 to 4 Weeks)
Here’s the part that can surprise people if they’re expecting instant gratification. The class includes the hands-on forming time, but the combustion and glaze finishing happens later. The stated timeline for combustion and glaze processing is 1 week up to 4 weeks.
To make planning easier, think of your “finished look” as arriving later, not at the end of the 3 hours. Also, combustion for the final product is listed as not included in the base offering. The good news is that the provider says they can help with the process for fully glazing and baking—just understand that the firing is an added step, not a guaranteed included cost.
So before you commit, decide which category you want:
- If you want only the making experience and are fine with the finish arriving later, this class works well.
- If you want your ceramics fully completed at the end of the workshop, you’ll likely feel disappointed, because firing isn’t instant and combustion isn’t included.






Price and Value: Why $50 Can Be a Great Deal (If You Plan for the Finish)
At $50 per person for a 3-hour wheel throwing basic class, this can be good value—especially because the class isn’t just a tour. You’re using a wheel throwing machine, working with clay, and getting structured teaching on how to form shapes.
Where the value really comes from is output and learning:
- You can create multiple attempts.
- You choose up to three pieces to keep.
- You get to practice the core mechanics of wheel throwing rather than just learning how to operate one trick.
The tradeoff is that the “final ceramic journey” has a cost and a timeline. Because combustion for the final product isn’t included, you should budget for additional finishing if you want fully glazed and baked results.
In other words: the base price buys you the making and the framework. The finish part is the add-on that depends on how fully you want the ceramic resolved.
Logistics That Matter: Where to Meet and What to Bring
The meeting point is listed as:
Jl. Nakula No.511, Guwang, Kec. Sukawati, Kabupaten Gianyar, Bali 80582, Indonesia
It’s also described as part of a factory area, so you’ll want to arrive with enough buffer time to find the exact property and settle in. If you’re relying on messages or confirmation details, don’t wait until the last minute to double-check directions. Ceramic workshops can run on tight hands-on schedules, and getting there late can cut into your wheel time.
What’s provided:
- Apron
- Bottled water
- Clay (scaled and provided for the session)
- Wheel machine usage
- Coloring materials if you want to add variation
What’s not provided:
- Lunch and snacks
- Private transportation
So bring a simple plan: eat beforehand, or plan to grab food afterward. If you get motion-sick easily, keep that in mind too. Wheel throwing means you’ll be focused on turning motions and forming pressure for a sustained period.
Also, the experience is marked as private, so it’s just your group. That’s a big plus if you want more hands-on attention and less waiting.
Who Should Book This Wheel Throwing Class in Ubud?
This works best for you if:
- You want to learn actual wheel throwing basics, not just decorate.
- You like making something with your hands and you enjoy guided practice.
- You’re okay waiting 1–4 weeks for full glazing and firing.
It may be less ideal if:
- You need a finished, fully fired piece the same day.
- You expect a fully hands-off workshop where you do every step without guidance. Short classes often mean instructors step in to keep results moving.
It’s also a smart pick for couples or small groups because the experience is private. That usually makes it easier to ask “how do I fix this?” questions in the moment, which is the difference between a frustrating attempt and a learning attempt.
Tips for Booking and Showing Up Prepared
Because the process involves both making and later finishing, your success depends on clarity. Here are practical steps that help:
- Confirm that you understand what’s included for your final pieces (forming only versus glazing and firing).
- Plan for the waiting period. Decide what you’ll do if the final process takes closer to 4 weeks.
- Arrive with time to find the factory meeting point. Then you can settle in and start working with less stress.
If communication is sometimes a weak spot for you (email backlogs happen everywhere), it’s worth following up on directions and expectations early. The class is short—wasted time waiting around is the easiest way to lose value.
Should You Book This Wheel Throwing Class in Ubud?
If your goal is to learn the real basics of wheel throwing and you’re comfortable with the reality that ceramics finish later, I’d say it’s a strong booking. The $50 price can feel fair because you’re doing the work on a machine with provided materials, plus you get to choose up to three pieces to keep.
Book it if you want a hands-on craft day in Ubud that goes beyond a quick photo stop. Just don’t book it if you need ready-to-go, fully glazed and baked ceramics the same day—because firing and glazing aren’t instant, and combustion for final products isn’t included.
FAQ
How long is the wheel throwing class?
It lasts about 3 hours.
Where is the meeting point?
Meet at Jl. Nakula No.511, Guwang, Kec. Sukawati, Kabupaten Gianyar, Bali 80582, Indonesia. The activity ends back at the meeting point.
What’s included in the $50 price?
You get all materials for the class (clay scaled for the session), wheel throwing machine usage, bottled water, and an apron. Coloring materials are also provided if you want to vary your art.
Can I choose more than one piece to bring home?
Yes. You’ll create multiple pieces during the class and choose your best three to bring home.
Is glazing and baking included during the class?
The class includes help with the ceramic process and notes that combustion and glaze processing take 1 to 4 weeks. Combustion for the final product is listed as not included, so glazing and baking may require additional arrangements.
What happens if the weather is bad or I need to cancel?
The experience requires good weather. If it’s canceled due to poor weather, you’ll be offered a different date or a full refund. You can cancel for a full refund up to 24 hours before the experience starts.