Rinjani rewards early mornings with serious payoff. I love the sunrise-from-3,726m goal and the way an English-speaking guide and porters keep the pace steady and the trip feeling safe. My only real caution: summit mornings can be very cold, and even if you get a sleeping bag, quality can vary—one sleeper outfit has been reported as not warm enough.
This is a 2-day trek with real camping by the crater rim, not a quick photo stop. You’ll walk through dense tropical forest, take real breaks at set viewpoints, and sleep under the stars after reaching the campsite around 2,639m. If you’re not comfortable with long uphill days and cold nights, this will feel like hard work.
In This Review
- Key Things That Make This Trek Worth It
- Why the 3,726m Summit Push Feels Different
- Day 1: From Sembalun Village to the Crater Rim Camp
- Night by the Crater Rim: Stars, Cold, and Hot Spring Reality
- Day 2: Sunrise Timing, Descent, and Rainforest Lunch
- Food, Water, and Camping Gear: What You Really Get
- Price and Value: What $190 Covers (and What It Doesn’t)
- Best Tips for First-Timers (and Common Mistakes)
- Who This 2D/1N Rinjani Trek Is For
- Should You Book This Mount Rinjani 2D/1N Summit Trek?
- FAQ
- How long is the Mount Rinjani 2D/1N hike to the summit?
- What altitude do you reach during the summit hike?
- Is an English-speaking guide included?
- What food and water are included?
- Are camping items included for the overnight stay?
- Do I need to pay for national park entry?
- What should I bring since some gear is not included?
Key Things That Make This Trek Worth It
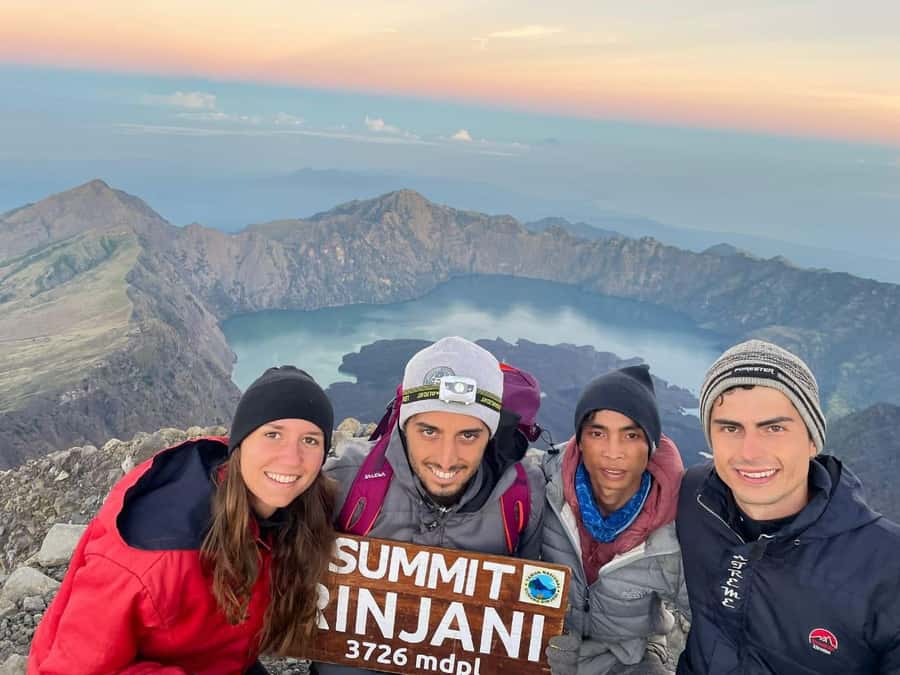
- 3,726m sunrise target with early-morning timing from the summit
- Campsite at ~2,639m crater rim for that dramatic night-and-sky feeling
- Day 1 route through multiple elevation stops (foothills, then higher foothills, then lunch)
- English guide + porter team that carries cooking and camping gear
- Meals, hot drinks, and fruit served as part of the trek rhythm
- Cold-weather preparation matters (headlamp and warm layers are key)
Why the 3,726m Summit Push Feels Different
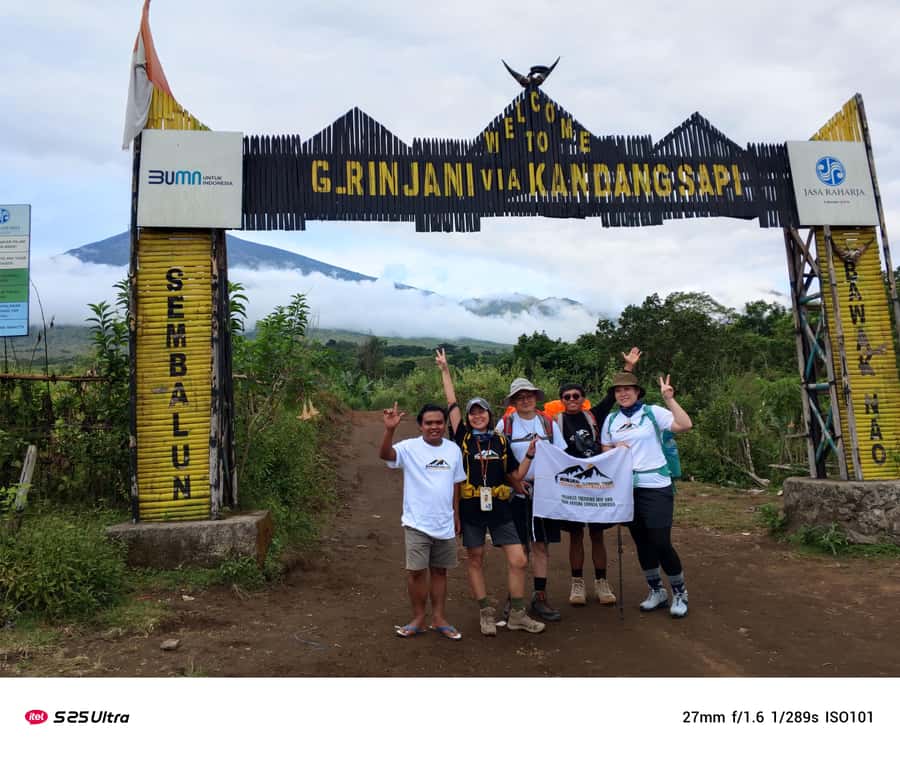
Mount Rinjani is not just about reaching a number on a map. The trek builds you up in layers. You start from Sembalun Village, climb through different zones of the mountain, and only then go for the big summit push. That pacing matters because it makes the summit day feel like the culmination, not a sudden jump.
The summit itself sits at 3,726 meters, and the whole plan revolves around seeing sunrise from that altitude. If you’ve ever done a hike where the hardest parts were the “random” ones—slippery rocks, loose gravel, sudden steep bits—Rinjani has a different rhythm. You’ll climb early, keep moving, and arrive before the sky fully wakes up. Then you get that wide, high-altitude glow that you simply don’t get on casual hikes.
One more thing I like for value: you’re not carrying everything. This tour includes porters to carry the cooking utensils and camping equipment, while the guide helps with route and pacing. That doesn’t remove the physical work, but it removes the extra weight that can turn a tough day into a misery contest.
You can also read our reviews of more tours and experiences in Lombok.
Day 1: From Sembalun Village to the Crater Rim Camp
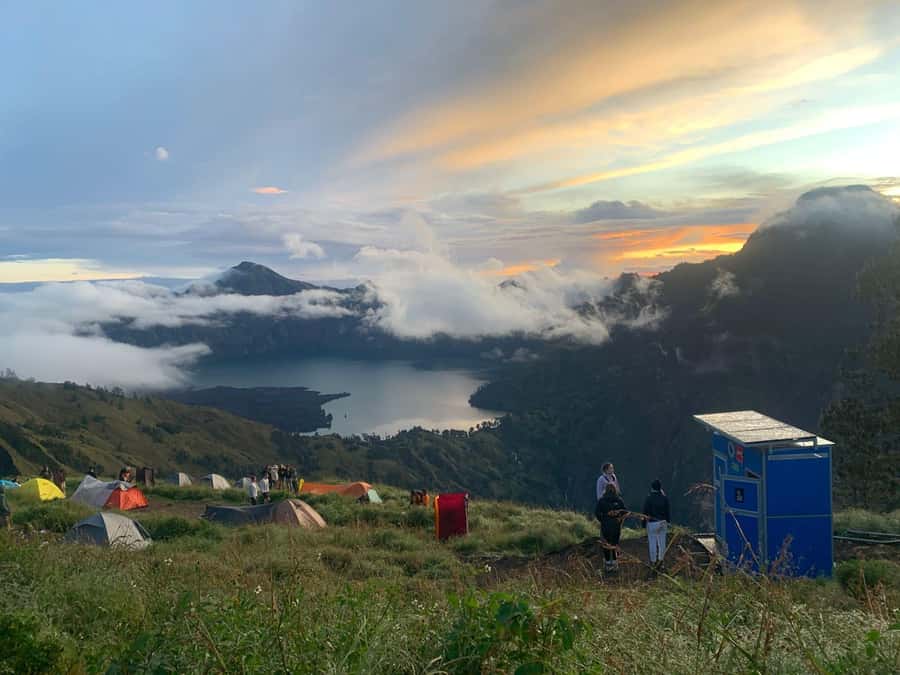
Day 1 is your “build and settle” day—enough climbing to feel accomplished, but paced so you can still enjoy the mountain rather than just survive it.
You’ll start with an early pick-up from your Lombok accommodation and travel to Sembalun Village. After that, you register at the Rinjani Information Center. This is one of those small steps that makes you feel like you’re entering a managed national park trek, not just wandering in.
Then the hiking begins:
- First, you trek to Pemantauan in the foothills, around 1,300m above sea level. This is where your legs warm up and your body adjusts to the steady uphill.
- Next you move up to Tengengean at about 1,500m. The air usually feels cooler as you gain height, and the trail tends to get more “mountain” feeling.
- You reach Pada Balong for a roughly 2-hour lunch break. This stop is important because it’s not just eating—it’s the mental reset. You get a pause in the climb, and you can hydrate properly before the final push to camp.
- Finally, you continue on to Sembalun Crater Rim, where you set up camp for the night at 2,639m.
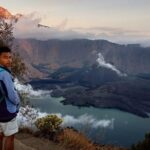
By the time you reach the crater rim, you’re high enough to feel the mountain air in your breathing, but you’re also not trapped in “summit mode” yet. The payoff is that night camp location: you’re positioned for big sky views and nighttime atmosphere.
The trade-off? Day 1 is still a long hiking effort. Even with porters handling camp gear, you should be ready for a full day of walking with changing terrain.
Night by the Crater Rim: Stars, Cold, and Hot Spring Reality
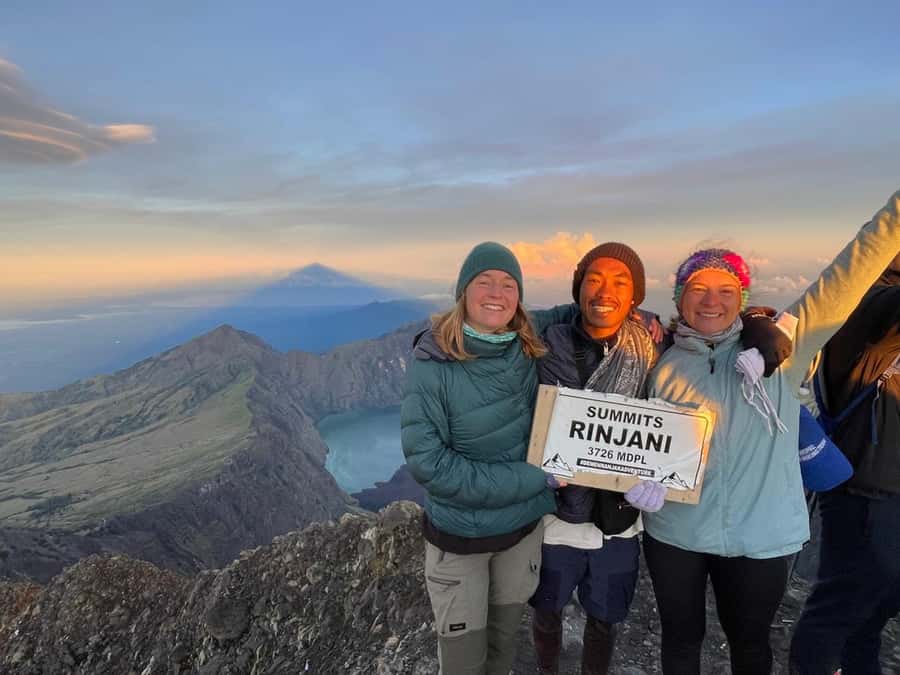
At camp, the experience shifts from “climbing” to “living on the mountain.” You’ll sleep in a tent near the crater rim and get that surreal sense of being close to the stars. It’s the kind of night where you stop thinking about your next step and start thinking about the sky.
What’s included helps this feel workable:
- Tent, sleeping mat, and sleeping bag
- A toilet tent and toilet paper
- Cooking gear and campsite setup handled for you
That means you’re mostly responsible for your own warmth, comfort, and personal items.
Now, here’s the practical caution that’s worth believing even if it’s not guaranteed: some people have found the hot springs to be nonexistent when rain season conditions are bad or it rained. In other words, don’t count on a relaxing soak as part of your plan. If it happens, great. If it doesn’t, you still have the crater rim night and early summit target.
Also, cold is real at these elevations. One review noted an issue with an older sleeping bag that wasn’t warm enough. So even with what’s provided, I’d treat warm layering as non-negotiable. If you only pack light summer clothes, you’ll likely feel it.
For your nighttime routine, bring what helps you move safely: a long flashlight/headlamp is recommended, and a long-life light is especially useful once darkness settles.
Day 2: Sunrise Timing, Descent, and Rainforest Lunch
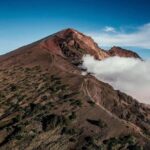
Day 2 starts with the summit plan. You’ll begin the ascent before daybreak if you want to reach the top in time to see sunrise at 3,726m. This is the core “full view” experience: the summit is the headline, but the timing is the magic trick.
If you prefer something less intense, the plan also offers an option to stay at the crater rim and enjoy sunrise there at a more relaxed pace. That means the tour isn’t only “push hard or fail.” Still, most people book for the summit view, so be honest with yourself about whether you can handle the climb while it’s dark and cold.
After sunrise, you’ll trek back down to the crater rim and have a hot breakfast. That hot meal after the summit is a big morale boost. It’s also where you notice how quickly your body shifts from “grind” to “recovery.”
Then comes the descent back toward Sembalun Village. You’ll stop for lunch in the rainforest along the way, which is a nice contrast to the crater-rim atmosphere. Forest hiking often feels easier on the mind if the trail is manageable, because you’re surrounded by green and shade instead of open volcanic views.
Finally, you’ll transfer back to your hotel after arrival.
The main drawback of Day 2 is simple: once you’ve reached the summit point, your knees still have work to do. A lot of people focus on the climb up, but the descent is the part that can linger after the tour ends.
Food, Water, and Camping Gear: What You Really Get
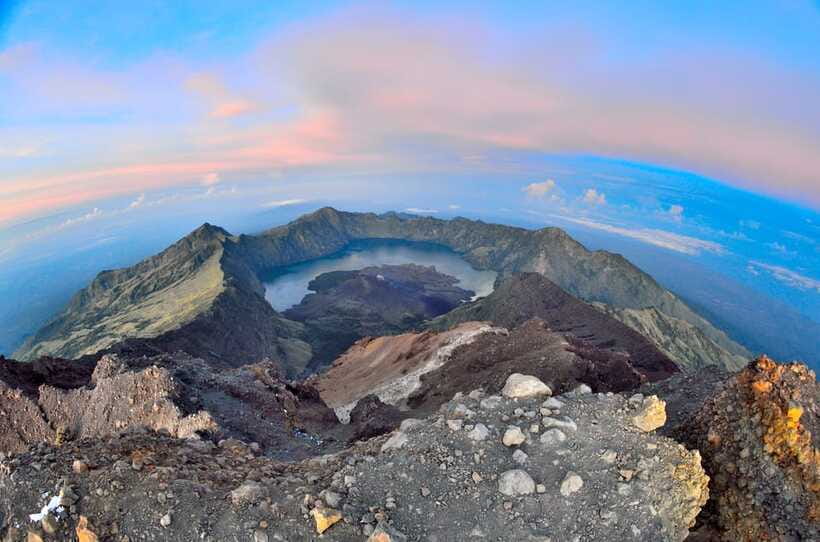
This trek takes care of the logistics most people struggle with: feeding you and providing the core overnight setup.
Here’s what’s included around meals and hydration:
- 3 liters of mineral water per person per day
- 3 meals a day
- Tea and coffee
- Fruit like pineapple and banana
- Snacks as part of the trek flow (this showed up in positive feedback)
That matters more than it sounds. At higher altitudes, dehydration sneaks up on you even when you feel like you’re just walking. Having water measured out and delivered helps you avoid the common mistake of under-drinking because you don’t want to stop.
Gear-wise, you get:
- Tent
- Sleeping bags
- Sleeping mat
- Toilet tent and toilet paper
- Trekking insurance (included)
- Backpack storage in the office
But a few key items are not included and can make or break comfort:
- Trekking shoes (you’ll need your own)
- Trekking pole
- Headgear (like a hat or head covering, though headlamp is specifically recommended)
- Warm clothes are not provided
One review also mentioned that a sleeping bag was older and not warm enough. So I’d treat the sleeping bag as helpful support, not a guarantee of perfect warmth. If you run cold, bring an extra warm layer.
If you’re planning photography, you can use a digital camera (recommended). And yes, a GoPro is not included.
Price and Value: What $190 Covers (and What It Doesn’t)
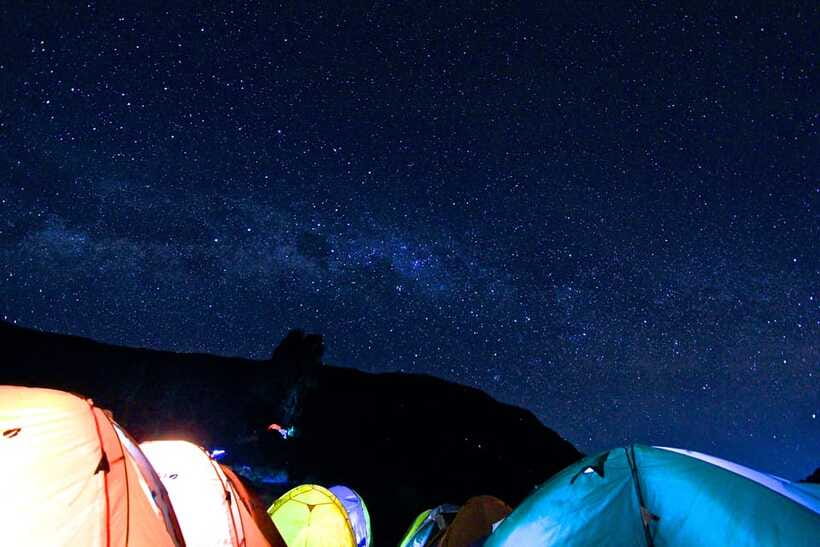
At $190 per person for a 2-day hike, the value depends on what you would otherwise pay yourself to do the same trip: guide time, porters, meals, camping setup, and entry fees.
This price covers a lot that would quickly add up:
- Guide and porters (including porter handling of cooking utensils and camping equipment)
- Food and drinking water
- Camping essentials: tent, sleeping mat, sleeping bag, and toilet tent
- Core beverages: tea and coffee
- National Park entry ticket listed as 250,000 IDR per day
- Transportation after the trek back to areas like Bangsal, Senggigi, and Mataram
- Extra trek support items like backpack storage in the office
What it does not cover is equally important:
- Pre-trek accommodation (you need your own night before departure)
- Most personal gear: trekking shoes, poles, headgear, warm layers
- Tips for guide and porters
- Optional camera/action gear like GoPro
- Air travel (you handle getting to Lombok)
To judge whether $190 is fair for you, think about effort level. If you want a guided, staffed trek with food and camp setup that lets you focus on the walking, it’s a good deal. If you already have gear, prefer to self-manage, and only care about a casual hike, you might find cheaper options elsewhere. But for a proper crater-rim camping trek and summit timing, the staffing and included overhead are exactly what you’re paying for.
Best Tips for First-Timers (and Common Mistakes)
If you’re new to summit hikes, Rinjani will test you in predictable ways: cold, fatigue, and the mental challenge of early starts.
Here’s what I’d do differently based on what matters on this route:
1) Pack for cold, not just sunshine.
Summit mornings can be bitter. Bring warm layers even if the daytime feels fine. One practical note from feedback: a front torch/headlamp is worth it so you can safely move during dark sections.
2) Don’t assume you’ll be warm enough without extra help.
Even with sleeping bags included, one report mentioned a sleeping bag that wasn’t warm enough. If you’re the type who shivers easily, bring extra insulation (like a warm top).
3) Wear real hiking shoes.
Trekking shoes are not included, and the trail is not the place to use “I’ll make these work” footwear.
4) Plan your expectations for hot springs.
If it rains, conditions may ruin the hot-spring experience. Treat it as a bonus, not a guarantee.
5) Think of your trek as pacing practice.
Porters carry camp gear, but you still hike. The “right” strategy is steady movement, not racing the trail. The guide and porters help manage the tempo, and that’s a real advantage.
6) Bring personal medicine.
The tour suggests packing any personal medicine. That’s not just for emergencies—it’s also for the small things that keep you comfortable.
Who This 2D/1N Rinjani Trek Is For
This trek fits people who want the classic Lombok volcano experience without trying to DIY the hardest parts.
You’ll likely enjoy it if you:
- Can walk long distances and handle a multi-hour uphill day
- Like structured treks with a guide and porter team
- Want crater-rim camping and a summit target, not just a viewpoint
You might want to skip this trek if you:
- Have a mountain sickness issue or are sensitive to altitude
- Have a height phobia (the tour data says people with height phobias are not allowed)
- Are looking for a gentle walk
There’s also a minimum age requirement: 10 years old.
Fitness matters here. “Good enough for a hike” isn’t always enough. Think about whether you can keep a steady pace for a full day, then do another demanding morning the next day.
Should You Book This Mount Rinjani 2D/1N Summit Trek?
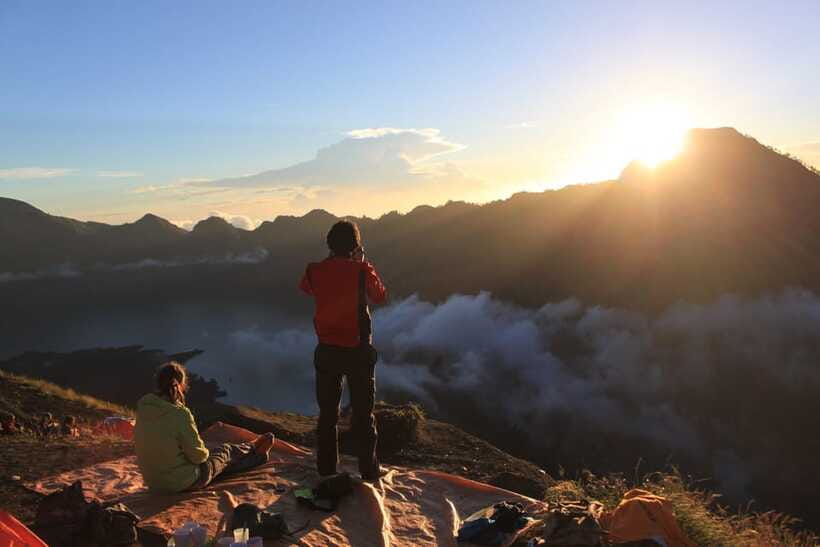
I think you should book this if your main goal is a real summit attempt with organized camping, English guidance, and food/water taken care of. The crater rim night and the sunrise from 3,726m are the kinds of experiences that stick, especially when the trek team is attentive and you’re not carrying camp gear.
Don’t book (or book only after careful self-check) if cold nights and early starts sound like your personal nightmare. Also, plan for the fact that sleeping bag warmth can vary, and hot-spring plans may fail with rainy conditions.
If you’re the type who prepares—warm layers, headlamp, solid shoes—and you’re comfortable with altitude limits and a full hiking effort, this trek feels like strong value for your time and energy. For $190, you’re paying for the hard-to-organize parts so you can focus on the mountain.
FAQ
How long is the Mount Rinjani 2D/1N hike to the summit?
The trek lasts 2 days.
What altitude do you reach during the summit hike?
The summit is at 3,726 meters. The campsite on Day 1 is at about 2,639 meters.
Is an English-speaking guide included?
Yes. The guide is English-speaking, and there are also porters.
What food and water are included?
You get 3 liters of mineral water per day per person and 3 meals a day, plus tea and coffee. Fruit such as pineapple and banana is also included.
Are camping items included for the overnight stay?
Yes. The tour includes a tent, sleeping bag, sleeping mat, and a toilet tent with toilet paper.
Do I need to pay for national park entry?
Yes, the national park entry ticket is listed as 250,000 IDR per day and is included in the tour.
What should I bring since some gear is not included?
The tour recommends trekking shoes, a thick coat or jacket, headlamp/flashlight, small towels, a long-lasting light, personal medicine, and a digital camera. Trekking shoes, poles, headgear, and warm clothes are not included.