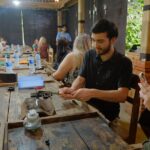
Silver sparks in Ubud, and you leave with art. In this 90-minute to 3-hour workshop, you work at a bench with an experienced silversmith, turning up to 5 grams of silver into earrings, a ring, or a pendant.
I like that it’s truly hands-on. You may get to practice key steps like melting, forging, grinding, brazing, and fitting your design together, with the silversmith jumping in for the trickier parts. I also like the creative structure: you pick from designs in a catalog book, then personalize your piece with details like engravings or stones.
One consideration: there are limits built into the price. If you go beyond the included silver amount, you’ll pay an extra 85,000 IDR per gram, so come ready for the metal (and gem) temptation.
In This Review
- Key things I’d focus on before you book
- Why this Ubud workshop feels like craft, not a show
- Choosing your jewelry: catalog designs, options, and personalization
- At the bench: what you’ll actually do with the silver
- Timing in real life: how 90 minutes turns into 3 hours
- Price and value: what $28 covers, and where extra costs show up
- The 5-gram silver limit
- Adding stones or gems
- One more practical money tip
- Guides, languages, and why the teaching style matters
- What to wear, what to bring, and how to get the best result
- Pair it with a Monkey Forest and Ubud day
- The take-home moment: your finished piece and small extras
- Who should book this silver jewelry class
- Should you book Bali Silver Class near Monkey Forest?
- FAQ
- How long is the silver jewelry making class?
- What jewelry can I make in this workshop?
- How much silver is included?
- What happens if I want more than 5 grams of silver?
- Are gems or stones included?
- Do I need any prior experience?
- What languages do the instructors speak?
- Is this class suitable for children?
- What should I wear to the class?
- Is there a cancellation policy?
- Is it wheelchair accessible?
Key things I’d focus on before you book
- Up to 5 grams of silver included so you’re not paying separately for the metal
- Real bench work like melting, forging, and finishing steps, not just watching
- Designs from a catalog book plus the option to make changes within the time limit
- Small-group feel with an instructor who can guide you in English, Indonesian, or Malay
- Extra charges are clear: more silver and adding stones cost extra, so plan ahead
Why this Ubud workshop feels like craft, not a show
This Bali silver jewelry making class is the kind of activity that changes your vacation rhythm. Instead of doing another checklist stop around Ubud, you sit down and make something you can actually wear. The setup is hands-on from the first stages with tools and materials in front of you, plus guidance from the silversmith.
The biggest reason it works is the balance between freedom and support. You’re not just handed a finished template. You choose a design direction from sample pieces, and then you work it through the process at your own pace. The result is more personal than a typical souvenir shop run, because you’re part of the making.
The second reason people love it is the care. Many sessions include detailed attention to the final shape and polish, and you may even find that the team can clean up other silver you’re wearing while you’re there. That turns a simple workshop into a small upgrade for your whole trip look.
You can also read our reviews of more tours and experiences in Ubud.


Choosing your jewelry: catalog designs, options, and personalization
You start by looking through the provided catalog book of designs. In practice, that catalog gives you a focused menu—one booking described selecting from around 50 example pieces—so you’re not stuck inventing everything from scratch. If you’re the type who wants a matching set, you can build matching rings, too.
What can you make? The class is set up for silver jewelry pieces such as:
- rings
- earrings
- pendants
- bracelets
- safety pins
Even if you’re laser-focused on one item (like a ring), it helps to browse the range because the design shapes your time. A more involved style can easily push you toward the longer end of the 90 minutes to 3 hours window.
Personal touches are where it gets fun. You can work on details like engraving and gem or stone settings (with extra cost if you add them). One booking even requested Arabic letters for engraving, and the team helped make it happen. That’s the sort of thing you’ll appreciate if you want the piece to feel like yours, not just the workshop’s idea of yours.
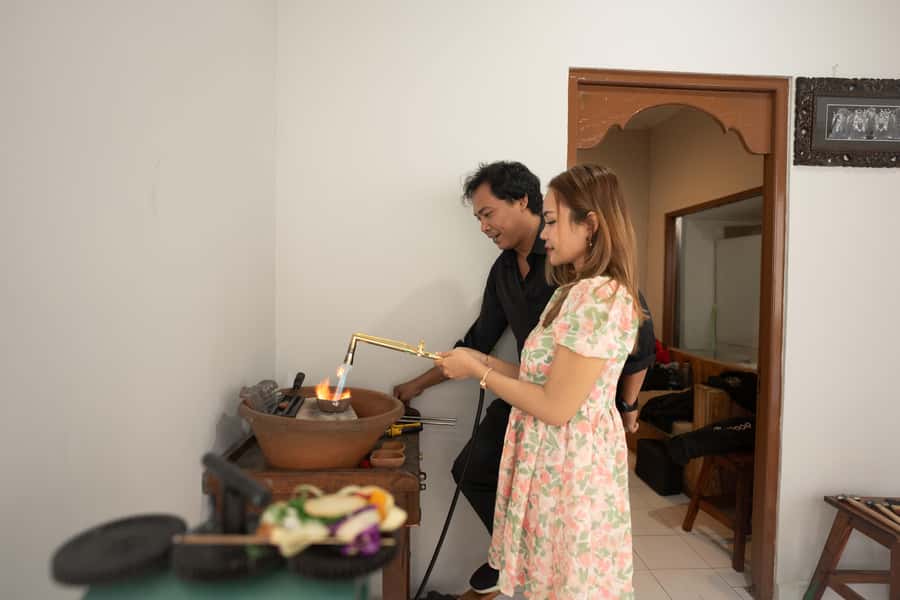
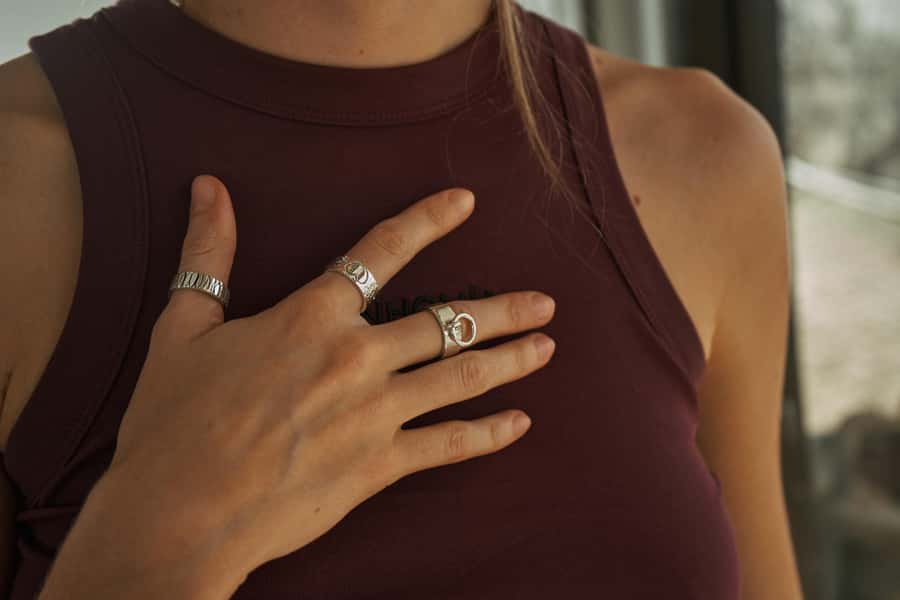
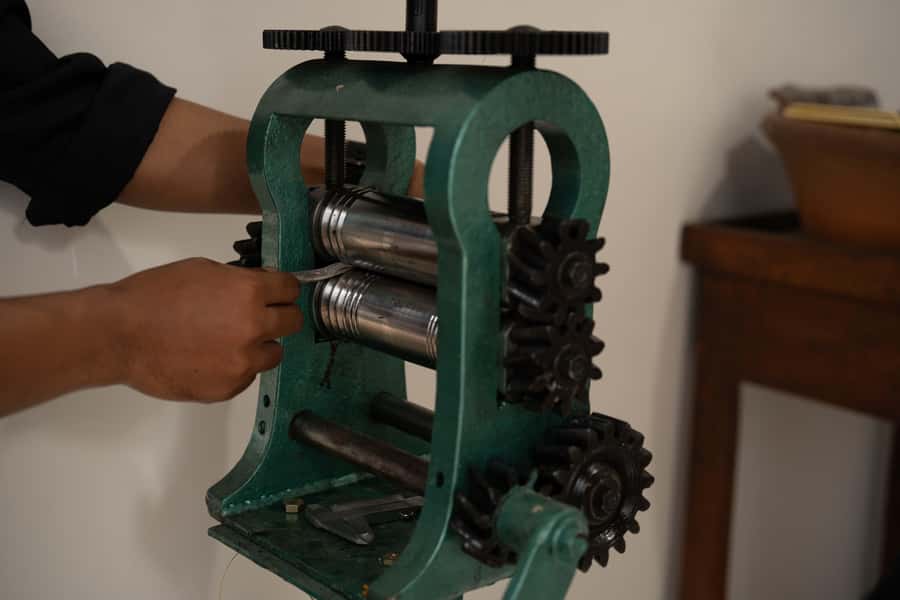
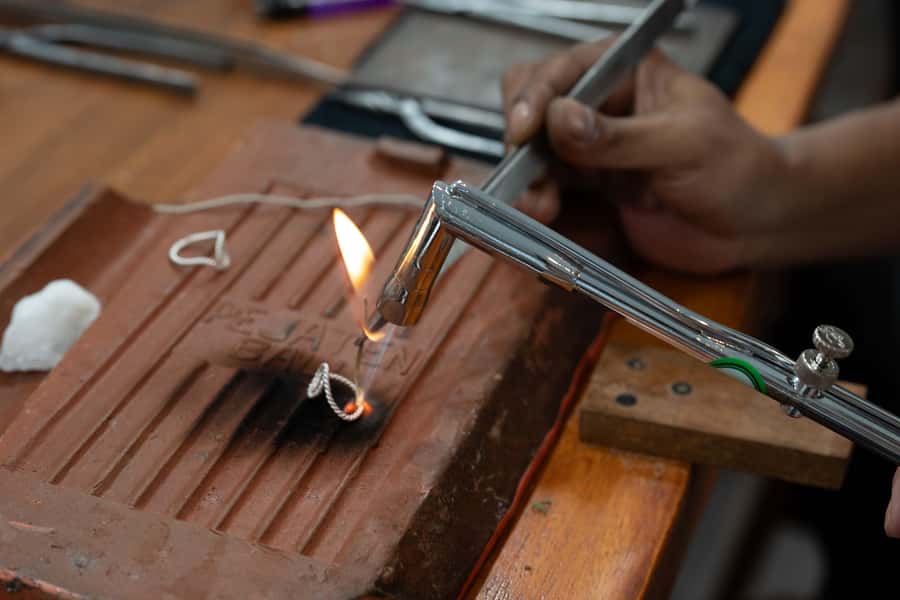
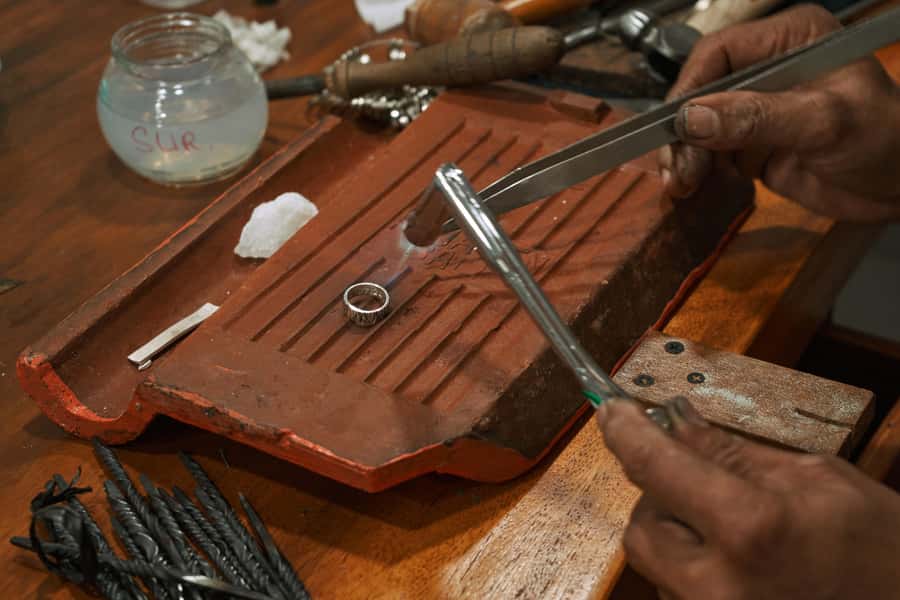
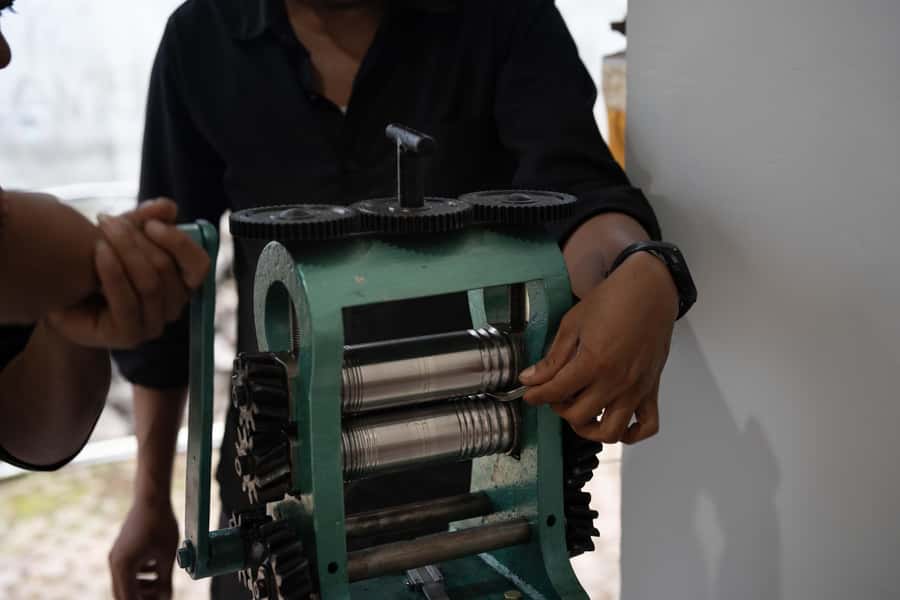
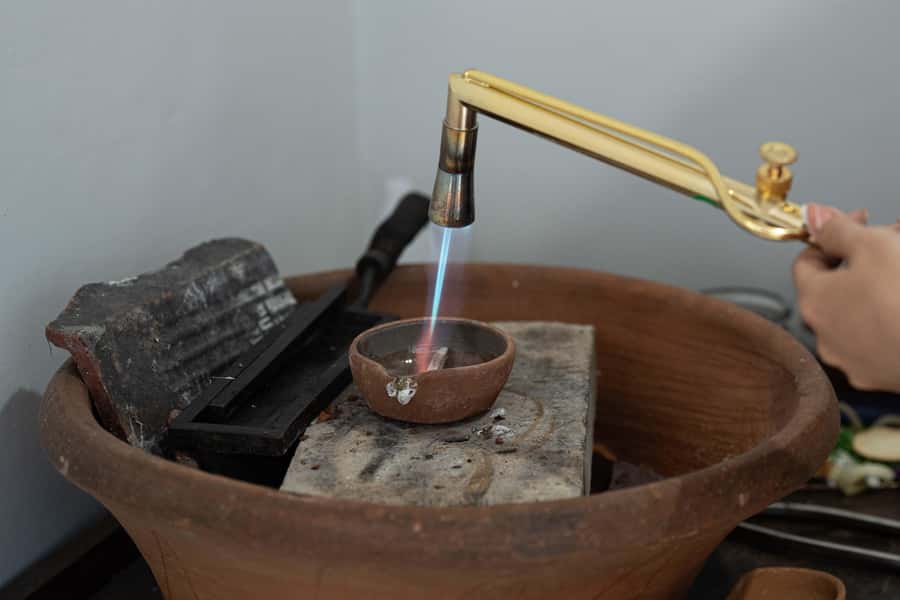
At the bench: what you’ll actually do with the silver

This isn’t a “watch and wave” session. The course includes the core steps of turning raw silver into jewelry. Depending on your design and timing, you may handle parts of the process yourself, while the silversmith handles the most technical steps to keep your piece accurate.
Here’s what the workflow looks like in plain terms:
- You melt and shape the silver to get it ready for your component form.
- You forge and grind to refine the metal into the right profile.
- You brazing and assemble pieces so the design holds together correctly.
- You fill in your design and then move toward finishing.
- Finally, you polish so it’s smooth and wearable.
You’ll also work with gems or stones in the process if you add them. That’s one area where costs can rise (more on that soon), but it’s also where your finished piece can go from nice to “wow, I made this.”
One practical tip: don’t assume every step means equal hands-on time. Multiple bookings describe that the guides are patient and interactive, but also that they take over the harder parts so your jewelry stays on track. That’s actually a good thing. You get the satisfaction of doing the work, without ending up with a wobbly ring that never quite fits.
Timing in real life: how 90 minutes turns into 3 hours
The class runs 90 minutes to 3 hours, depending on the jewelry design. That wide range matters because silver jewelry is detail work. A simple form can finish fast; a more intricate design takes longer to shape, assemble, and polish.
If you’re planning around other Ubud activities, pick your slot based on your tolerance for patience. If you want a quick win, choose a design that looks straightforward. If you want more customization time (and the chance for extra steps), budget closer to the maximum time.
Also remember: each participant can make only one silver jewelry piece. That keeps things focused, but it also means you’ll be making fewer total decisions in exchange for deeper involvement with your one piece.
Price and value: what $28 covers, and where extra costs show up
The headline price is $28 per person, which is good value when you compare what’s included: the class time (90 minutes to 3 hours), high-quality silver (up to 5 grams), all the necessary tools, personalized instruction, and you take the finished piece home.
But there are two places where your final cost can change.


The 5-gram silver limit
You receive up to 5 grams of silver for your piece. If your jewelry uses less than 5 grams, the workshop still accounts for it as 5 grams. If you want to go past the included amount, the additional fee is:
- 85,000 IDR per extra gram beyond 5 grams
And an important rule: you can’t share silver with another person. So if you’re making matching rings, each person should plan around their own metal allowance.
Adding stones or gems
You’ll likely pay an additional charge for adding gems or stones. If you’re the type who wants sparkle, decide before you start so there are no surprises once you’re in the creative flow.
One more practical money tip
They also advise you to prepare cash for any excess silver charges. I’d take that advice seriously. You don’t want your workshop moment to pause because you’re scrambling to pay.
Overall, this is one of those deals where the base price is straightforward. The main risk isn’t hidden fees—it’s overshooting your metal or stone ideas without budgeting for the additions.
Guides, languages, and why the teaching style matters
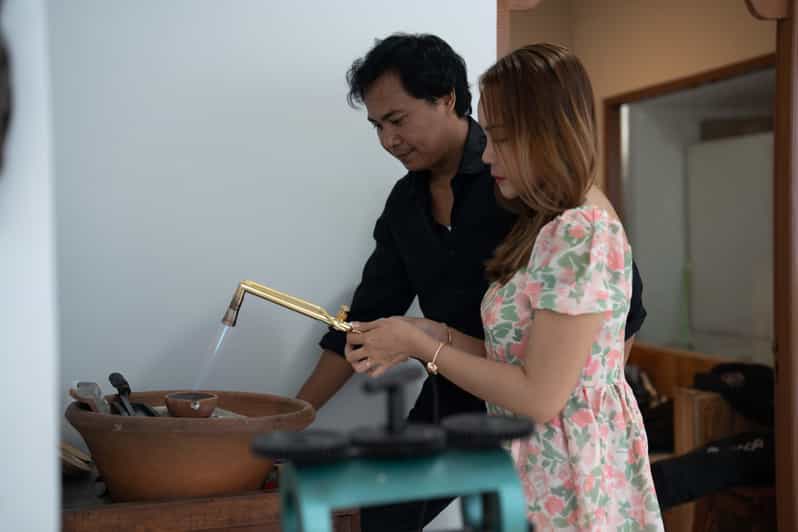
The instructor is listed as English, Indonesian, and Malay, and the overall teaching approach is hands-on and supportive. What really comes through in the feedback is patience and attention to detail. People often describe that the silversmiths explain each step clearly and keep helping until your piece looks right.
Names you might hear from different sessions include Nano, Wayan Ino, Dek Edi, and Pasta, plus Kadek Ber from one ring-making experience. Even if you don’t know the guide ahead of time, those names are a useful sign that the team supports a wide range of visitor styles—from careful and technical to playful and experimental.
Another teaching detail worth noticing: guides tend to guide you through the process while still letting you do as much as possible. If you want to be hands-on, you’ll likely get that. If you want confidence that it will come out wearable, you’ll also likely get that, because the team can polish and correct where needed.
What to wear, what to bring, and how to get the best result
This workshop is a craft class, so dress for it. Wear comfortable clothing suitable for crafting activities. You’ll be handling tools and working with materials, and you don’t want your outfit turning into your biggest distraction.
Plan to bring:
- comfortable clothes
- any cash you might need for extra silver (85,000 IDR per gram over 5g)
- a clear idea of whether you want stones or gem settings (since those can add extra charges)
Prior experience isn’t required. The class is suitable for all skill levels, and the instruction is designed for first-timers. The bigger factor is your willingness to slow down and pay attention. If you can do that, your piece has a better chance of looking like what you imagined when you first opened the catalog book.
Pair it with a Monkey Forest and Ubud day
This is located near Ubud’s Monkey Forest, which makes it easy to fit into a normal Ubud day. It’s also a solid choice when weather isn’t cooperating. You’ll get out of the heat and into a focused indoor workshop that keeps your afternoon moving.
Meeting point can vary depending on the option you book, so confirm where to go when you reserve. From there, think about your schedule like this:
- pick your design first so you’re not rushing
- give yourself time to get there before your session starts
- plan a little buffer afterward, since you’ll likely want to admire your take-home piece right away
Also, remember you only make one piece. If you’re trying to coordinate timing with a partner for matching jewelry, choose a slot that fits both of you comfortably.
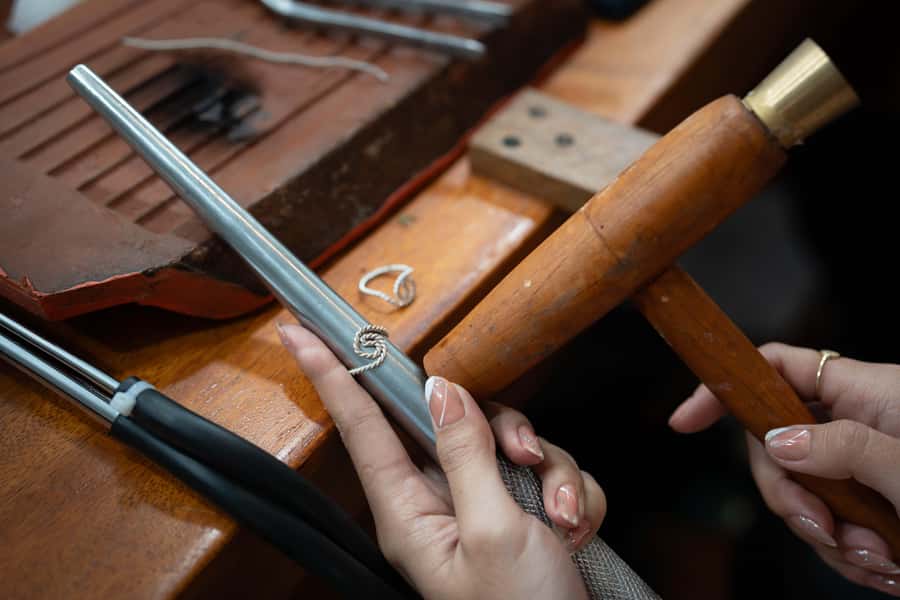
The take-home moment: your finished piece and small extras
At the end, you take home your finished silver jewelry. The workshop includes the finished piece to keep, and the end goal is something you can wear soon after (as a souvenir with real value).
One small bonus that appears in multiple bookings: polishing and cleaning can extend beyond your own piece. If you’re wearing silver items during the class, it’s worth asking if they can polish them too. People report that they polished other rings on-site.
That’s a nice touch, because it gives you a “before and after” improvement, not just a new item. If you came to Ubud with silver already, you might leave with your whole jewelry set looking sharper.
Who should book this silver jewelry class
This activity fits best if you want:
- a hands-on creative experience during your Ubud visit
- a wearable souvenir that you helped make
- a guided workshop where you don’t need prior skill
- an experience you can share as a couple (matching rings are a common plan)
It’s also a good choice if you like structure. You’re given sample designs and a clear process, but you can still personalize the details.
It may not fit if:
- you’re strict on budget and hate add-ons like extra silver or stones
- you want a purely passive activity with zero making involved
- you’re traveling with kids under 6 (not suitable)
Should you book Bali Silver Class near Monkey Forest?
I think this is worth booking if you want a real craft experience in Ubud and you like the idea of leaving with something you made with expert help. The base price gives you the metal (up to 5 grams), the tools, instruction, and a take-home piece. That makes it feel fair, not like a workshop that constantly asks for more money.
Book with extra care if you already know you want stones, heavier metal, or a very complex design. In those cases, bring cash and plan for the 85,000 IDR per gram overage beyond the included amount, plus any gem or stone charges.
If you’re ready to do focused work for a couple hours, you’ll probably love it. And if you’d rather be on vacation sightseeing instead, this one might feel like homework. Choose based on what you want your afternoon to be.
FAQ
How long is the silver jewelry making class?
The class runs 90 minutes to 3 hours, depending on the jewelry design you choose.
What jewelry can I make in this workshop?
You can choose to make items such as a ring, earrings, pendant, bracelet, or even a safety pin.
How much silver is included?
You get up to 5 grams of silver for your jewelry piece (depending on the design). If your piece uses less than 5 grams, it’s still accounted for as 5 grams.
What happens if I want more than 5 grams of silver?
If your total silver weight is over 5 grams, you’ll be charged an additional fee of 85,000 IDR per extra gram. You should have cash available for this.
Are gems or stones included?
Gems or stones are not automatically included. There is an additional charge for adding stones.
Do I need any prior experience?
No prior experience is required. The class is suitable for participants of all skill levels.
What languages do the instructors speak?
The instructor can teach in English, Indonesian, and Malay.
Is this class suitable for children?
It is not suitable for children under 6 years old.
What should I wear to the class?
Wear comfortable clothing suitable for crafting activities.
Is there a cancellation policy?
Yes. You can cancel up to 24 hours in advance for a full refund, and you can reserve now and pay later.
Is it wheelchair accessible?
Yes, the activity is wheelchair accessible.