A volcano trek in two days changes your pace fast. The Senaru-to-crater-rim route on Mount Rinjani is all about big views and a steady, well-managed climb through changing scenery. It’s one of those Lombok experiences that mixes epic scenery with real logistics support.
I like the way the trek is run from the first check-in at the Rinjani Trek Centre in Senaru to the crater-rim camp at night. You also get a practical setup: guides and porters handle cooking gear and camping equipment, while you focus on moving, resting, and taking photos. One drawback to plan for: the route is physically demanding, and you’ll want moderate fitness and good weather to get the most out of those rim views.
If you’re the type who hates chaos on multi-day hikes, this one should fit your style. The route builds in breaks at clear checkpoints (Pos 1, Pos 2, then a longer stop around Pos 3 at about 2,000m), and your second day finishes back in Senaru around 1pm. That rhythm matters when you’re climbing and descending with altitude in play. Still, remember that the Rinjani National Park permit is not included, so budget IDR 150,000 per person per day on top.
I also appreciate the emphasis on support and encouragement. In the feedback I saw, guides and crew like DD and Jou get singled out for organization and help when the climb feels hard. The main consideration is simple: you’re camping outdoors near the crater rim, so you’ll need to be comfortable with a rugged overnight rather than a hotel-style setup.
In This Review
- Key things to know before you go
- Senaru Trek Centre check-in: starting where the hike actually begins
- Day 1 through tropical forest to Pos 3 near 2,000m
- The scenery shift: from forest to grassland and steep sections
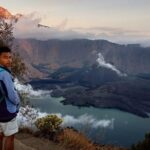
- The crater rim camp at 2,641m: sunset, Bali, and the Segara Anak basin
- Day 2 sunrise and the return hike back to Senaru by ~1pm
- What’s actually included: guides, porters, camping gear, and 3 litres of water
- Price and logistics: is $154 good value for a crater rim trek?
- Guides and encouragement: why organization feels like part of the view
- Who should book this Senaru crater rim 2D1N trek
- Should you book Mt. Rinjani Tour 2D1N (Senaru to crater rim)?
- FAQ
- What time does the tour start?
- Where is the meeting point?
- How long is the Mt. Rinjani 2D1N Senaru crater rim trek?
- Are the national park permits included in the price?
- What’s included for food, water, and camping?
- Do I need moderate physical fitness?
- Is this tour private?
Key things to know before you go
- Senaru start at 601m: You begin in the lowlands and climb up into grassland and steep sections fast.
- Pos 1, Pos 2, and Pos 3 around 2,000m: Built-in breaks keep the hike manageable over Day 1.
- Crater rim camp at 2,641m: Sunrise and sunset views are the point, with Bali’s Mount Agung and the Gilis in sight when weather cooperates.
- Porters carry camp and cooking gear: You’re not hauling mattresses, tents, or kitchen gear.
- 3 litres of mineral water per person per day: Hydration support is built into the plan.
- National park permit is extra: Budget the IDR 150,000 per person per day you’ll need for the park.
Senaru Trek Centre check-in: starting where the hike actually begins
The whole experience hinges on a smooth start, and that’s where this trip gets it right. You begin in Senaru at the Rinjani Trek Centre, with registration before you hit the trail. The start point sits at about 601m, which is a helpful baseline: you’re not thrown into altitude immediately, but you’re also not stuck at sea level all day.
You’ll start at 7:00am, and that early start matters on a mountain. It gives your body time to settle into the climb and gives you daylight for the higher sections. If you’re coming from elsewhere on Lombok, plan to arrive the day before so you can start relaxed.
One small but important detail: you get luggage storage at the office. That’s valuable on trek days because you don’t want to carry extra bags you don’t need once you’re on the trail. The trip is also described as private, meaning it’s only your group. That typically makes the pace and stop times feel more “run by your guide” instead of like a crowded bus line.
You can also read our reviews of more tours and experiences in Lombok.

Day 1 through tropical forest to Pos 3 near 2,000m
Day 1 is where you earn the views. The first part of the trail moves through dense tropical forest, which is a blessing early on. Forest cover can take the edge off heat and glare, and it makes the hike feel like it’s unfolding rather than just climbing straight upward.
Your first pauses come at Pos 1 and Pos 2. These aren’t just random photo stops. They’re rest breaks where you can reset your breathing and grab snacks. If you tend to go out too fast at the start of a hike, those early checkpoints help you slow down without anyone having to scold you.
Then you reach Pos 3 at around 2,000m, and that’s the longer break for lunch. This is the spot where the trek starts to feel like a mountain day rather than a forest walk. Lunch at this altitude break is smart because you’re transitioning your body from easy hiking mechanics into steeper, more demanding work.
The scenery shift: from forest to grassland and steep sections
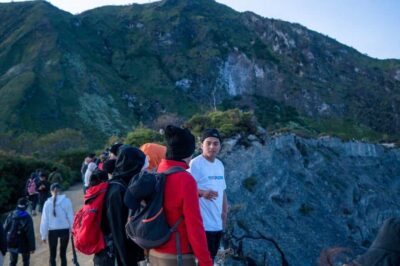
After Pos 3, the trail changes character. As you climb, forest gives way to grassland, and the hike becomes increasingly steep. This is exactly the kind of transition you want in a short 2D1N plan, because it gives you variety while still keeping the timetable realistic.
Here’s the practical takeaway: steep means more time spent managing effort. Short steps, steady breathing, and listening to your guide matter more than speed. The route description makes it clear this isn’t a casual stroll. It’s a climb to the crater rim, and the payoff arrives as you get higher.
And the higher you go, the more the world opens up. You’re not just moving upward—you’re moving into the zone where the crater rim views start to become real. When you see the horizon widen, it becomes easier to keep going, even when your legs get that “not again” feeling.
The crater rim camp at 2,641m: sunset, Bali, and the Segara Anak basin
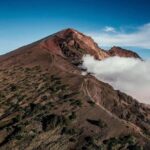
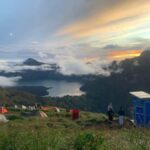
You camp at Senaru Crater Rim (2,641m) on the night of Day 1. This is the heart of the experience because the crater rim is where the mountain turns into a scene you can’t really fake with a screen.
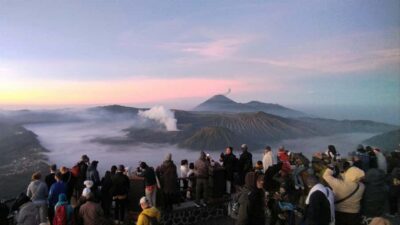
The route description and what people highlight point to a few key view zones from the rim. From here, you can catch sunset and look toward:
- Mount Agung in Bali
- the Gili Islands
- the summit area of Mount Rinjani (as seen from the crater rim)
- Lake Segara Anak
- Gunung Baru, the smaller volcanic cone within the crater
That list matters because it’s not just “a view.” It’s a full volcanic story in one frame. Lake Segara Anak is the crater basin visual. Gunung Baru adds shape and depth. And being able to see Bali and the Gilis ties Lombok’s scenery into the bigger Indonesia picture.
From a comfort standpoint, this is still camping. The included gear keeps you functional, but it’s not glamping. You’ll likely spend the evening with the rhythm of camp life: set up, eat, then use the remaining light for photos and just staring at a landscape that doesn’t act normal.
One tip worth thinking about: plan your sunset and sunrise time like a photo session with a body. Bring your attention to the rim when the light turns. The mountain won’t care if you’re still fussing with your camera.
Day 2 sunrise and the return hike back to Senaru by ~1pm
Day 2 starts with a sunrise before you head back down. That timing is valuable. Sunrise on the rim gives you a second lighting chance, which helps with photos and makes the crater rim feel different from the night before.
After sunrise, you get a leisurely breakfast, then return trekking to Senaru. The second day is still a trek, but the plan is clearly structured with rest and snack breaks. You’ll pause at Pos 2 for a longer lunch break, then continue until you arrive in Senaru at about 1pm.
This schedule makes a Day 2 finish that’s relatively friendly. You’re not fighting to get back in the dark, and you have time to think about your next stop on Lombok after you reach Senaru.
If you’re wondering what matters most on the descent: it’s how you protect your knees and ankles. Steep downhills can be tougher than uphill effort, even when your lungs feel okay. Use your guide’s pacing and don’t let the excitement of reaching town trick you into rushing.
What’s actually included: guides, porters, camping gear, and 3 litres of water
The included package is built around taking weight and hassle off your shoulders. You’ll have a trekking guide and porters. Porters carry the cooking gear and camping equipment, which is a big deal on a 2-day hike. It means your load can stay more realistic for a steep crater rim route.
The equipment list is also specific, which helps you prepare mentally:
- Tent and toilet tent with paper
- Sleeping bags
- Mattress and pillow
- Chairs
- Camping setup gear
That chair detail might sound small, but after hours on the trail it’s the difference between sitting and getting comfortable enough to enjoy the evening. When people praised the experience, support and organization were the big themes, and this is the kind of behind-the-scenes planning that makes those words make sense.
Food and water are included too. You get food and drinking water on the trek, including 3 litres of mineral water per person per day. That amount is meaningful for a climb where you may be sweating even when conditions feel cool. You’re also not left guessing how hydration works during the day.
One more practical inclusion: luggage storage at the office means you don’t need to haul bags you don’t use on the trek.
Price and logistics: is $154 good value for a crater rim trek?
At $154 per person for 2 days (about), this is best thought of as paying for three things: trained mountain support, camp infrastructure, and meal/water coverage.
The big value point is the porter support and camping setup. With a crater rim hike, the cost driver usually isn’t your guide’s words—it’s hauling camp gear, managing cooking, and keeping the operation running across two days. If porters are carrying the camping equipment, you’re getting more than a guided hike. You’re getting a moving campsite.
That said, there’s an extra budget item you should not ignore: the Rinjani National Park permit/tickets are not included, at IDR 150,000 per person per day. Since this is a 2-day plan, this permit cost scales with your days on the trail. If you’re budgeting tightly, this is the first line item to calculate before you decide.
Also note what’s not included: accommodation before the trek and transportation (pickup before and transfers after aren’t included). This matters because the total trip cost isn’t just the tour price. In real planning, you’ll need to factor in at least one night near Senaru if you want a calm morning start.
Finally, this trip is described as requiring good weather. If it’s cancelled due to poor weather, you’ll be offered a different date or a full refund. If you’re going during a season with unpredictable mountain conditions, it’s worth booking with a little schedule flexibility.
Guides and encouragement: why organization feels like part of the view
One of the most praised parts of this style of trek is not the scenery, even though you’ll remember that forever. It’s how you feel while you’re climbing.
In the feedback, people specifically thanked their guide DD, along with Jou for great organization, help, and encouragement during the trek. That’s what you want on a route that becomes steep as it climbs. Good guidance doesn’t just keep you safe. It also helps you pace yourself when your motivation wobbles.
You can feel the benefit of this organization in small places: rest breaks at Pos 1 and Pos 2, a longer stop with lunch around Pos 3 at about 2,000m, and a return day that doesn’t leave you guessing what comes next. Clear stop points can turn a hard climb into a series of achievable goals.
And because the porters handle cooking and camp equipment, you’re not stuck multitasking. You hike, eat, sleep, and repeat. That’s how you keep the trip fun instead of stressful.
Who should book this Senaru crater rim 2D1N trek
This tour is a strong match if you want a serious mountain experience without doing DIY camping logistics. You’ll like it most if you’re comfortable with a steep hike and your fitness is at least moderate.
It’s also a good fit if you care about photo-worthy scenery. From the crater rim, the view includes Mount Agung in Bali, the Gilis, Lake Segara Anak, and Gunung Baru. That combination is the kind of visual variety that keeps your camera busy for both sunrise and sunset.
If you want a calm, easy walk with low effort, you may find the steep sections challenging. The route description makes it clear the climb is real, and the second day still involves trekking back down.
Should you book Mt. Rinjani Tour 2D1N (Senaru to crater rim)?
Book it if you want an organized, guided crater rim trek with camp comfort basics (tents, sleeping bags, mattresses, chairs) and a plan that builds in rest points at key altitudes. The value is strongest when you appreciate what’s included: porters carrying the heavy camp gear, meals and water across both days, and a route designed to get you sunrise and sunset on the rim.
Think twice if you don’t have moderate fitness for steep trekking, or if you’re trying to keep the whole trip cost super low once you add the park permit and your own accommodation/transport. Also be honest about weather: this kind of mountain trip is weather-dependent, and your best scenery days depend on clear skies.
If you’re ready for a real hike with real crater views, this is one of the most direct ways to earn them in Lombok.
FAQ
What time does the tour start?
The trek starts at 7:00am.
Where is the meeting point?
The meeting point is at Lombok Volcano Trekking, Jl. Pariwisata, Senaru, Kec. Bayan, Kabupaten Lombok Utara, Nusa Tenggara Bar. 83354, Indonesia.
How long is the Mt. Rinjani 2D1N Senaru crater rim trek?
It’s approximately 2 days. You return to Senaru at about 1pm on Day 2.
Are the national park permits included in the price?
No. Rinjani National Park permit/tickets are not included and cost IDR 150,000 per person per day.
What’s included for food, water, and camping?
You get food and drinking water during the trek, including 3 litres of mineral water per person per day. Camping equipment is included, such as tents, sleeping bags, mattresses, pillows, chairs, and a toilet tent with paper.
Do I need moderate physical fitness?
Yes. The experience is described as requiring a moderate physical fitness level.
Is this tour private?
Yes. It’s listed as a private tour/activity, and only your group participates.