Mount Rinjani hits different at sunrise. This 3-day trek pairs a hard summit push with time around Segara Anak Lake and crater rim viewpoints, plus a hot spring stop. What I like most is the clear pacing between big altitude moments and calmer sections, so you can keep moving without blowing yourself up.
You also get real camp support. The package includes tents and sleeping gear, and the guide + porters run the daily rhythm—breakfast, lunch, dinner, camp setup, and trekking logistics—so you focus on the climb. The main drawback to weigh is the physical demand: you need moderate fitness, very early wake-ups, and you should expect cold and tough footing near the top.
In This Review
- Key Highlights You’ll Feel on the Trek
- Why This 3-Day Rinjani Summit + Lake Plan Works
- Price and Logistics: What Your $170 Covers (and Why It’s Not a Bad Deal)
- Getting Ready: The 4:00 am Start and Why You Should Arrive Early
- Day 1: Senaru Village, Sembalun Village, and the Walk to Pelawangan Sembalun
- Day 2: 2:00 am Summit Attack, Sunrise Views, Segara Anak Lake, and Crater Rim Senaru
- Day 3: Crater Rim Descent to Senaru Village (and a Trek That Finishes Strong)
- Guides, Porters, and Camp Comfort You’ll Actually Use
- What to Pack: Your Gear Checklist (and What You Can Rent)
- Safety, Fitness, and Weather: Set Your Expectations the Right Way
- Who This Trek Suits Best (and Who Should Rethink It)
- Should You Book This 3-Day Rinjani Summit + Lake Trek?
- FAQ
- What time does the tour start?
- How long is the trek?
- What’s included in the price?
- What gear should I bring?
- Is summit access included?
- Where do you start each day?
- How many people are in a group?
- What if the weather is bad?
- Can the route be shortened if I’m uncomfortable?
Key Highlights You’ll Feel on the Trek
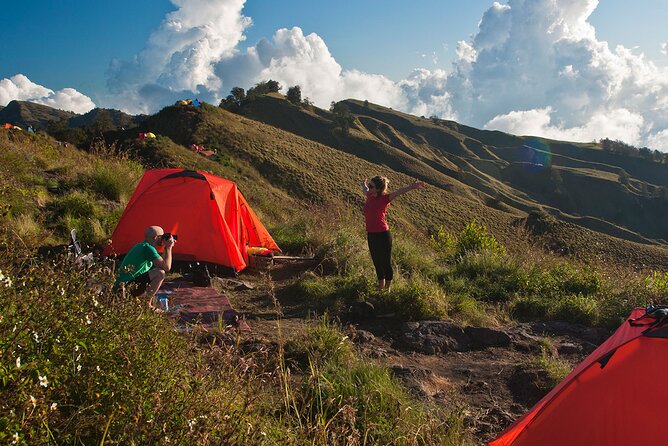
- 4:00 am start day-to-day flow: early pick-ups keep you on schedule from Senaru and Sembalun.
- 2:00 am summit push: a timed attempt that’s built around reaching the summit for sunrise views.
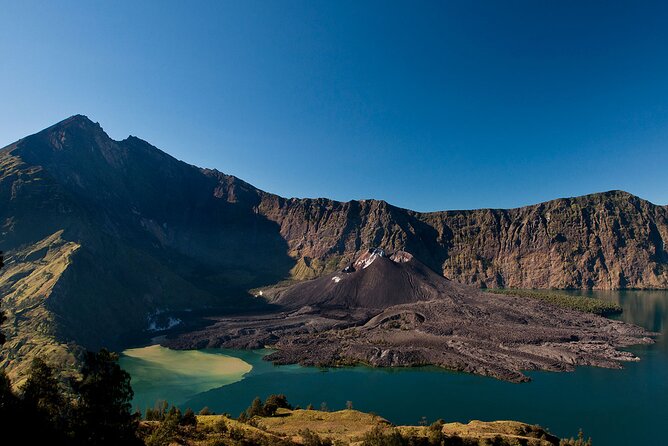
- Crater rim + lake views: you get Segara Anak Lake from multiple angles, including crater rim sunset.
- Guide flexibility on route comfort: there’s a track record of adjusting the hike if needed.
- Porters run the camp: hot meals and camp setup are part of the experience, not an afterthought.
- Small group size (max 6): easier pace control and more personal attention than bigger buses.
Why This 3-Day Rinjani Summit + Lake Plan Works
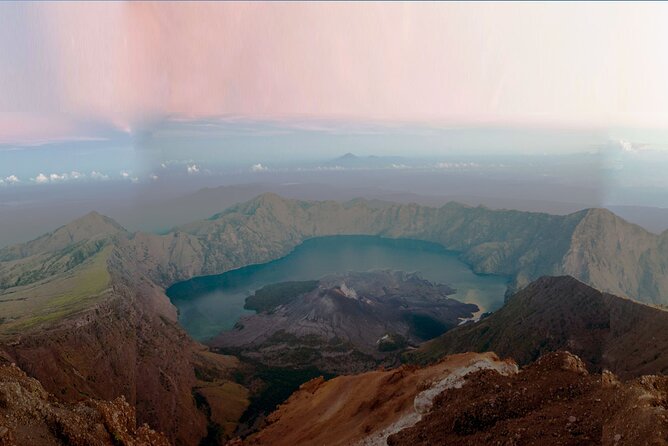
This trek is designed for people who want the full Rinjani hit in a short window: summit sunrise energy, then lake crater scenery, then the long walk down with less drama than you might fear. The timing matters. You’re not just “walking in the mountain fog and hoping.” You’re moving in a sequence that gives you the best shot at the summit window and then positions you for lake/crater rim views afterward.
Two things make this plan especially practical. First, the route includes distinct effort phases. You climb, you recover, you descend, and you climb again—so you’re not stuck grinding at 100 percent the whole time. Second, the logistics are handled for you: gear is brought, meals are scheduled, and you’re not doing route math in the dark.
The big consideration is altitude stress. Even if the hike is well supported, the summit requires you to be comfortable pushing hard early in the morning. If you tend to panic in cold wind, or you’ve never done steep climbs at altitude, take that seriously before booking.
You can also read our reviews of more tours and experiences in Lombok.


Price and Logistics: What Your $170 Covers (and Why It’s Not a Bad Deal)
At $170 for about 3 days, this package can feel like good value—mostly because the included items reduce what you’d otherwise pay for separately. You’re not only buying a guide; you’re buying a full trekking setup.
Here’s what you get that typically costs extra when you piece things together:
- Return transport around Lombok mainland area
- Camping basics: tent, sleeping bag, mattress, pillow, plus camp furniture like chair/table
- Toilet tent
- Guide and porter team
- Entrance fees and trekking insurance
- Meals (breakfast 3 times, lunch 3 times, dinner 2 times)
- Trekking certificate
- Snack and soft drinks
What’s not included is your personal clothing and footwear. You can rent items like trekking poles and shoes (listed as available for about $5). Tips for the crew are also not mandatory, which helps if you’re budgeting tightly.
So the real value question is this: are you saving stress and add-on costs, not just money? With porters, gear, and meals included, the trek becomes more about timing and your effort—less about improvising on the trail.
Getting Ready: The 4:00 am Start and Why You Should Arrive Early
This tour starts at 4:00 am with pickup in Lombok. The exact pickup time depends on where your hotel is, which is normal for this kind of route. The practical takeaway: don’t arrive at the last minute.
You need to be in Lombok at least the day before trekking. That matters because you’ll be contacted and confirmed for your booking, and you’ll want a real night of sleep—not a late ferry scramble and then an early climb. Past participants have also highlighted smooth pickup experiences around Lombok connections, which is a good sign for timing.
Also note the group size limit: up to 6 travelers. That usually means fewer delays and more room to set your pace with your guide, instead of getting steamrolled by a bigger crowd.
Day 1: Senaru Village, Sembalun Village, and the Walk to Pelawangan Sembalun
Day 1 begins in Senaru Village. You’ll be picked up from your hotel lobby and transferred straight to the village. Then you check in at the operator office, grab breakfast, and meet your guide and crew for a trekking briefing. This is where you get your first reality check on weather, timing, and what your body will likely feel on summit day.
After that, you drive about 45 minutes to Sembalun Village. Here you handle the admin that keeps your trek official: medical card and the QR code for the trekking pass, plus registration at the national park office. This part may sound boring, but it’s worth it. You want the paperwork done cleanly so summit day isn’t a surprise.
Then the actual trekking starts from Pelawangan Sembalun. You begin with a gentle ascent through village edges and farm areas, then move into open grassland where cattle graze. This stretch is a great warm-up. The path helps you settle into the rhythm—steady steps, breathing control, and learning how the footing feels when you’re not yet exhausted.
You’re on the trail for about 8 hours on day 1. That can feel long if you think of trekking as a short activity. But it’s also strategic: it sets you up for the next day’s brutal early climb without wasting time.
A drawback to keep in mind: day 1 is long, and it’s not just “pretty scenery time.” You’ll still work. If you’re coming off a travel day, take a nap that night if you can.
Day 2: 2:00 am Summit Attack, Sunrise Views, Segara Anak Lake, and Crater Rim Senaru
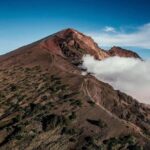
Day 2 is the big one, and it starts with discipline. You need to be ready around 2:00 am for the summit attempt. The climb to the summit (about 3726 m) takes roughly 3 to 3.5 hours. This is not a casual hike. You’re pushing your body while it’s cold and dark, usually before you feel fully human again.
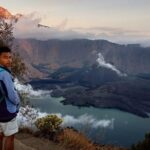
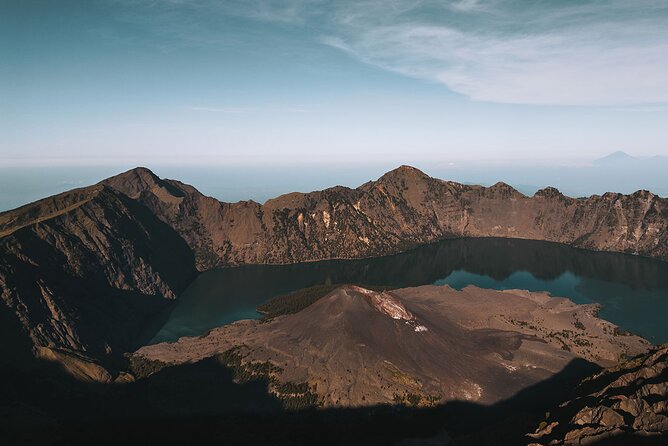
Once you reach the top, the reward is sunrise across the Wallace Line—with views toward Bali and Mount Agung (when conditions allow). Sunrise here is more than a photo moment. It’s the payoff for the suffering: your legs, your lungs, your focus—it all adds up in a single view.
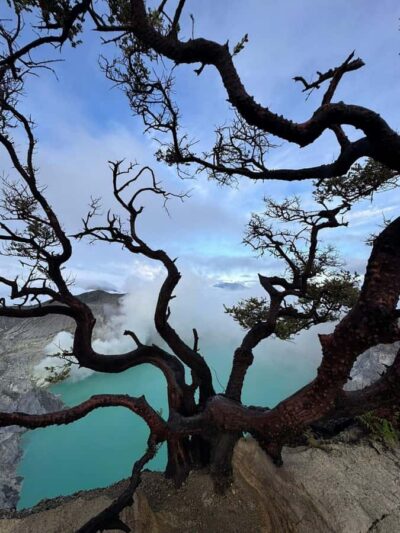
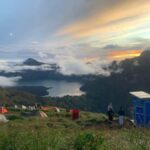
After summit, you descend toward Segara Anak Lake. It takes about 2 to 2.5 hours to reach the lake. You’ll be rewarded with valley views and the presence of Mount Sangkareang on the west side of the Rinjani National Park area. The lake area also serves as a gear and energy reset, and you’ll have breakfast before descending, which helps.
Then, later in the day, you shift back into a climb. Around 14:00, you start heading to Senaru Crater Rim (about 2 to 3 hours ascend to the next camp site). You aim to arrive before sunset, which gives you crater rim views back toward the lake from a different angle than the morning summit view.
Two things stand out about this day. First, you get real variation: summit, lake, rim, camp. Second, the schedule is tight enough that you can’t “wander.” You’re moving because the mountain timeline demands it.
If you get motion sickness easily or you struggle in low-light conditions, plan for it. This day is built on early starts and long attention spans, not casual pacing.
Day 3: Crater Rim Descent to Senaru Village (and a Trek That Finishes Strong)
Day 3 is the long walk down, and it’s still active. After breakfast, you descend back to Senaru Village at about 601 m elevation. Rest stops are built in, and lunch is prepared during the hike, including lunch after walking from the crater rim with extra break timing around Post 1.
This day takes about 6 hours of walking under normal conditions. You’ll end at the Rinjani Trekking Center office. The finish matters. You’re not just dropped somewhere vague. You reach an office where the trek is formally wrapped.
What you’ll likely notice on day 3 is how your body feels after altitude. Your legs may be tired, but your brain is usually clearer. It’s a good ending to a trip that spikes hard on day 2.
Guides, Porters, and Camp Comfort You’ll Actually Use
The most praised part of this trek is how the team handles you on tough hours. Names that show up with strong feedback include guides like Jake, Antok, Joe, Sap, Pendi, and Ardi. Even when the hike gets steep, participants describe a consistent theme: guidance, safety focus, and a calm approach.
Porters are another core strength. In practice, they handle the heavy work of camp setup and cooking, and they keep you fed when you need it most. There’s even a note about porters bringing hot meals and keeping the vibe light, including small games like frisbee. That kind of morale matters when you’re tired.
Also, there’s a real advantage in having the option to adjust. Some trekkers report that the team can offer route shortening if you don’t feel comfortable, and at least one case involved changing the route on the third day with no extra cost when someone was too tired. That doesn’t mean you should plan on changes. It does mean the operator has a track record of not leaving you stuck.
What to Pack: Your Gear Checklist (and What You Can Rent)
The basics are included: tent, sleeping bag, mattress, pillow, and camp items like a toilet tent plus table/chair. That’s a big load off your shoulders.
What you’ll need to bring:
- Personal items like jacket and trekking shoes (the tour lists these as personal gear)
- Trekking poles if you want them
- Any day-to-day hiking essentials you prefer
If you don’t want to carry everything from home, you can rent gear locally for about $5 (listed for items like shoes and trekking poles). Still, don’t treat that as a guarantee of perfect fit. Try to rent only if you know your size and you’re okay with less-than-ideal shoe comfort.
If you run cold, bring layers. Summit day is early and can feel harsh even if daytime feels mild.
Safety, Fitness, and Weather: Set Your Expectations the Right Way
This package is designed for experienced trekkers, but private options are mentioned as a possible fit for true beginners. Even then, the mountain doesn’t care how experienced your group is. The climb to the summit and the long day 1 and day 3 walking are still real physical challenges.
So what should you judge yourself on?
- Can you handle steep walking for hours?
- Can you wake up at 2:00 am and function while your body warms up slowly?
- Do you manage stress well when you’re cold and tired?
Weather matters a lot. The experience requires good weather, and if it’s canceled due to poor weather, you’ll be offered another date or a full refund. On the flip side, this trip is not refundable if you cancel for personal reasons, so only book once you’re confident your dates work.
Also remember: altitude can hit even fit hikers. If you’re unsure, talk honestly with your guide. The trekking team’s flexibility is a strength, but the safest move is to adjust early, not late.
Who This Trek Suits Best (and Who Should Rethink It)
This is a strong fit for you if:
- You want Mount Rinjani summit + Segara Anak Lake in one trip
- You’re comfortable with early mornings and long walking days
- You want a supported trek with porters and meals handled
- You appreciate a small group up to 6 travelers
It may not be the best match if:
- You have very limited trekking experience and you’re not ready for altitude and cold early starts
- You hate long days and prefer shorter, gentler outings
- You need constant creature comforts on multi-day hikes
Should You Book This 3-Day Rinjani Summit + Lake Trek?
I’d book this if you want a well-structured Rinjani experience that trades guesswork for clear pacing and support. The biggest reasons to lean yes are the summit timing, the lake/crater rim variety, and the crew strength—especially guides known for keeping people safe and porters who actually make camp work.
I’d hold off if you’re not ready for steep climbing and early wake-ups, or if you’re booking without a solid fitness base. Also, remember the booking is not flexible for personal cancellations, so lock it in only when your schedule is real.
If you do book, focus on the basics that matter: bring proper layers, manage your effort on day 1 so day 2 doesn’t crush you, and trust the guide’s pacing advice. The views are the payoff, but the real win is finishing the trek feeling cared for—not abandoned in the hard parts.
FAQ
What time does the tour start?
The start time is listed as 4:00 am, with pickup from your hotel. Pickup time can vary depending on your hotel location.
How long is the trek?
It’s a 3-day trek, approximately.
What’s included in the price?
Included are return transport around Lombok mainland area, tents and sleeping equipment (sleeping bag, mattress, pillow), guide and porter services, snacks and soft drinks, entrance fees and trekking insurance, a trekking certificate, and meals (3 breakfasts, 3 lunches, 2 dinners).
What gear should I bring?
Personal gear like jackets, trekking poles, and trekking shoes is not included. Gear rental is available for around $5.
Is summit access included?
Yes. The trek includes a summit attack to Mount Rinjani’s summit at around 3726 m.
Where do you start each day?
Day 1 begins in Senaru Village, with a transfer to Sembalun Village for national park registration before the main trek begins.
How many people are in a group?
The tour lists a maximum of 6 travelers.
What if the weather is bad?
The experience requires good weather. If it’s canceled due to poor weather, you’ll be offered a different date or a full refund.
Can the route be shortened if I’m uncomfortable?
The provided information includes cases where the team offered to shorten the hike or adjust the route if needed for comfort.