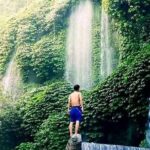
Rinjani in two days sounds intense, and it is. What makes this trek special is the combo of tropical forest walking, then a climb to Mt. Rinjani’s crater rim, where you get big sky moments over the Gilis, Bali, and Lake Segara Anak.
I really like how the day-by-day plan is broken into clear stopping points (pos 1, pos 2, pos 3), so you’re not just grinding uphill with no rhythm. I also like that you’re not doing it alone: you get a local guide and porters, plus transfers and food that keep you moving.
One thing to consider: the hike includes steep, stony sections and you’ll want proper footwear and a headlamp/torch for the camp hours (those aren’t included). If you show up with only sandals and wishful thinking, the crater rim won’t care.
In This Review
- Key things that make this trek worth it
- Entering Senaru: The Start That Sets Your Pace
- Day 1 Pos 1 to Pos 2 (Montong Satas): Jungle Walking With Snacks and Breathers
- Pos 2 to Pos 3 (Mondokan Lokak): Lunch, Higher Air, and the Monkey Warning
- From the Rim Approach to Pelawangan 1: Steep Trail, Open Views, Big Feeling
- Crater Rim Night Camping: Lake Segara Anak Views and Real Time for Photos
- Day 2 Sunrise and the 5–6 Hour Descent Back to Senaru
- What Your $205 Really Buys (and What It Doesn’t)
- Transfers, Mobile Tickets, and the Comfort Layer Before Walking
- Packing Tips That Actually Match This Trek
- Who This Trek Fits Best (and Who Might Struggle)
- Should You Book This 2D/1N Rinjani Crater Rim Trek?
- FAQ
- What time does the trek start?
- Is this trek private or shared?
- What’s included in the price?
- What should I bring that’s not included?
- Are additional porters available for personal luggage?
- Is there free cancellation?
Key things that make this trek worth it
- Private group pacing: You hike at your group’s rhythm, not a forced crowd pace.
- Forest to savana transition: Coffee trees and rainforest shade first, then open savana views near the rim.
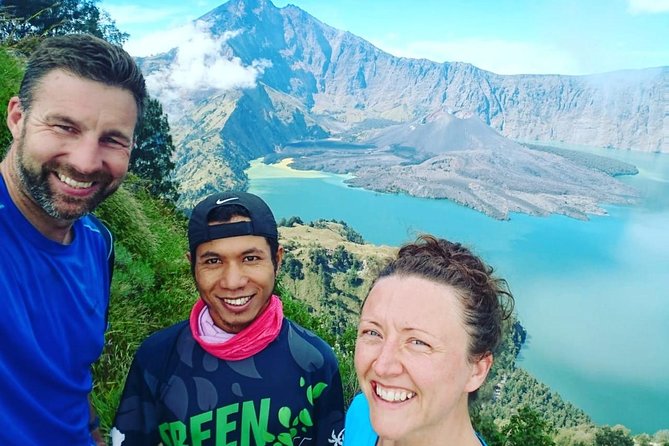
- Crater rim night camping: Sunrise and sunset views from the rim over the Gilis and Mt. Agung.
- Food and camping gear included: Tent, sleeping bag, mat, toilet tent, plus meals and drinks.
- Bring the right small items: A torch helps, and monkeys at pos 3 have a habit of targeting small bags.
- Guide support with real names: Guides like Dana, Adi, Yun, Sri, and Ubang are known for patient, attentive guiding in practice.
Entering Senaru: The Start That Sets Your Pace
You start early, around 7:00 am, because Mt. Rinjani gives you better conditions when the day is still cool. The walk begins in the Senaru area at the registration point in the village, then your trek climbs gradually through a very different set of environments.
The first stretch is outdoors, with views and plant life you’ll actually notice—coffee trees, bamboo, and other plants tied to local life. Then the trail shifts into a tropical rainforest gate, where the humidity does a quick rewrite of how breathing feels. It’s not just scenic; it’s practical. That shade means you can keep a steady tempo without cooking immediately.
From there, the trek stays guided and structured: your guide keeps you moving through pos stops, and porters handle the heavy stuff and the setup side of camping. That matters on Rinjani, because the crater rim is gorgeous, but getting there takes effort.
You can also read our reviews of more tours and experiences in Lombok.


Day 1 Pos 1 to Pos 2 (Montong Satas): Jungle Walking With Snacks and Breathers
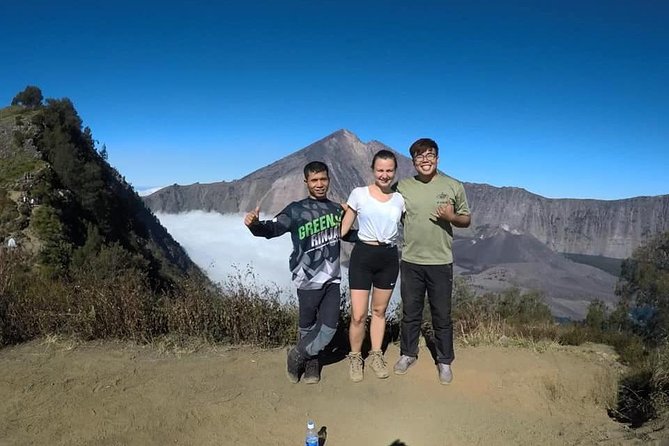
Your Day 1 route starts at pos 1, then you work up toward pos 2 (Montong Satas, ~1,500 m). The timing is set up for a morning rhythm: you walk for about 30 minutes through open views, then head into the rainforest for the bigger climb.
Expect roughly three hours to reach pos 2, with a pattern of humid shade plus short breaks. There’s usually a short stop after you enter the rainforest for regrouping, and you may hear monkeys—black/brown types are noted along the way.
Pos 2 is where the trek gets more civilized. You’ll stop to recover while the guide and porters prep things like:
- soft drinks, crackers, and fresh fruit
- bananas and pineapple are specifically mentioned
This is a great place to reset. You’ll feel the hike in your legs, but pos 2 helps prevent the common mistake: going out too fast and then suffering later. Use the break to sip water, refuel, and keep your breathing calm for the forest-to-highers transition.
Small drawback: rainforest humidity can make your shirt feel permanently damp. That’s normal. Bring a way to manage sweat without overpacking.
Pos 2 to Pos 3 (Mondokan Lokak): Lunch, Higher Air, and the Monkey Warning
From pos 2 you continue for about two more hours to pos 3 (Mondokan Lokak, ~2,000 m). This segment is where the trek begins to feel less like a stroll and more like a mission—still doable, but the effort builds.
One nice detail here is the mention of local strawberry growth along the way during certain months (June, July, August). Even if it’s not in season when you go, the point is good: you’re walking through living farmland-and-forest edges, not just a single wild trail.
At pos 3, the guide and porters cook lunch. You’ll get fresh fruits and biscuits, plus lunch and snacks as part of the package flow. The air is also usually cooler up here, which helps your pace.
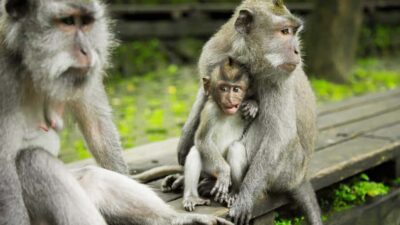
And yes, here’s the practical warning: there are brown monkeys around, and they can steal small items—especially small backpacks. Your move is simple: keep zippers closed, keep valuables on your body or in a secure pocket, and don’t leave a small bag hanging around. It’s not scary; it’s just a reminder that wildlife follows its own rules.
There’s also a rest period—around 1.5 hours—before you push higher toward the crater rim.
From the Rim Approach to Pelawangan 1: Steep Trail, Open Views, Big Feeling
After pos 3, you keep moving for roughly another 1.5 hours toward the crater rim. The trail first passes through the Mondokan Lokak area, and then you gradually transition from rainforest shade to more open savana on the hills.
The scenery changes fast. Instead of trees and humidity, you’ll get wider views, and the sky feels closer. You’ll have a break stop around Cemara Lima, described as about a short 25-minute stretch before reaching it, and then you continue for around one hour to reach Pelawangan 1 (Senaru Crater Rim, 2,641 m).
This final approach includes stony, steep climbing. It’s the part where you’ll appreciate two things:
1) a guide who watches your pace
2) porters handling the camping load
It’s also where the motivation hits hard. From Senaru rim viewpoints, you’re set up for skyline moments: sunset over the three Gilis, and a view toward Mt. Agung in Bali on clear evenings. Sunrise is also part of the show from the rim area by the valley of Mt. Sanggka Reyang, with smoke described as visible through the “hole” of the area overlooking the volcanic valley.
At the crater rim, you’re sleeping under the stars near the rim’s viewpoint. If you’re the type who loves weather and stars, this night is the whole reason you booked the trek.
Crater Rim Night Camping: Lake Segara Anak Views and Real Time for Photos
Once you arrive at the rim area, the experience becomes less about forward motion and more about absorbing the crater setting. Your camp time is set for sunset and sunrise.
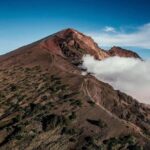
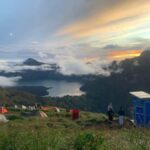
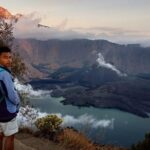
The key view here is Lake Segara Anak, described as in the middle of the crater. When the light changes, the crater walls and the lake feel like they belong to a different planet. You’ll also be able to see the shape of Mt. Rinjani itself, including the peak number mentioned: 3,726 m.
What you’ll likely notice right away is how the camp setup is handled for you. The included equipment covers the practical side:
- tent
- sleeping bag
- camping pillow, chair, and table
- toilet tent
- sleeping mat
Meals also keep you fueled. Day 1 includes dinner and snacks, and there’s bottled water plus food support through the day. Alcoholic beverages are also listed as included, which can be a small morale boost after a tough climb—just keep it sensible if you’ll be moving around at night.
One more useful note: a torch/headlamp is not included, but it’s strongly worth bringing because you’ll need light after dark, whether that’s for walking carefully around camp or changing layers.
If you want a good photo setup, don’t wait until the last minute. Find your spot early, and give your eyes time to adjust to night sky conditions. The stars are the reward for doing the hard part first.
Day 2 Sunrise and the 5–6 Hour Descent Back to Senaru
Day 2 is built around a simple but meaningful order: breakfast, sunrise, photos, then the long descent. After you wake up, you’ll enjoy the sunrise and take pictures with the crater lake scenery before heading down.
The descent back to Senaru village is described as 5–6 hours. That’s where your legs (especially knees and calves) will remind you the trek is real. The good news: you’re not starting over. You’ve already climbed, camped, and seen the rim views. Now it’s just controlled effort downhill.
Because day 2 ends with arrival at the trekking centre around 12.30 pm to 1:00 pm, the whole day has a clear arc. Then private transport takes you onward to your next destination.
This is one of those treks where “I survived day 1” becomes “okay, now I’ll finish strong.” Go slow on the way down—don’t try to sprint to feel done faster.
What Your $205 Really Buys (and What It Doesn’t)
At $205 for about 2 days (2D/1N), you’re paying for more than walking. The value is in what’s handled for you:
- a local guide
- porters for your group gear
- camping gear (tent, sleeping bag, mat, and camp furniture)
- meals, snacks, and drinks, plus bottled water
- transfers/transport for pickup and drop-off
- overnight accommodation (separate from the crater rim camping gear)
This is why the “private” part matters. A private tour typically means your hike pace is more flexible, and you’re less likely to get stuck behind a fast or slow group.
What’s not included matters too:
- extra porter for your luggage is $22/day
- headlamp/hand torch
- trekking shoes and a trekking jacket
- long pants/trousers and basic trekking layers
- tips for your guide and porters
- airplane ticket
In plain terms: you can’t show up underprepared and expect the company to fix it. But if you bring the right personal gear, the package handles the heavy and the logistics.
Transfers, Mobile Tickets, and the Comfort Layer Before Walking
This experience runs with pickup and transfer included, and it ends back at your meeting point. You also get a mobile ticket, which can simplify things when you’re juggling other plans in Lombok.
In real-life trekking, transfers are underrated. If you’re arriving from Bali or the islands, you don’t want to spend the morning hunting for the right road and the right office. Starting early also means you benefit from an operator that helps you get positioned before the first climb.
Even small moments—like getting settled the night before—can change how you feel on day 1. When you’re walking uphill from the first minute, any extra rest you can get is money well spent.
Packing Tips That Actually Match This Trek
The listing points you to the basics, and I’d treat these as non-negotiables for comfort and safety:
- Headlamp/torch for night camp
- trekking shoes (not just gym shoes)
- long pants/trousers and a windproof jacket
- sun protection (sunblock, cap/hat, sunglasses)
- insect repellent
- small towel
- trekking poles are optional (but helpful for the steep parts)
Bring a proper day pack for personal items. You don’t need to carry everything. Porters handle the big logistics, and you should keep your own load realistic.
Also: think about the monkey rule. A small bag is easy to misplace. Keep your essentials close and zipped.
Optional items you might like: binoculars for views, camera gear for rim photos, and a light layer system for changing temperatures from rainforest humidity to higher open air.
Who This Trek Fits Best (and Who Might Struggle)
This trek works best if you have moderate physical fitness and you’re comfortable hiking steep, stony trails. Day 1 includes multiple hours of rainforest-to-savana climbing, and day 2 includes a long 5–6 hour descent.
You’ll probably love it if:
- you want classic Lombok volcano scenery without committing to a longer expedition
- you like sunrise/sunset viewing as part of the plan, not a lucky bonus
- you want a private guide who can match your pace
You might find it tough if:
- your knees dislike downhill travel
- you expect a flat walk with easy footing
- you’re missing basic gear like shoes and a torch
Should You Book This 2D/1N Rinjani Crater Rim Trek?
I’d book it if you’re chasing one of Lombok’s signature experiences: Senaru to Rinjani rim, crater-lake views, and that night under stars at the edge of a living volcanic world. The structure is solid, and the package looks genuinely practical—meals, camping gear, guides, porters, and transfers all included.
But make your decision based on your gear and your legs. If you’re prepared with trekking shoes, layers, and a headlamp, you’ll feel supported from start to finish. If not, you’ll spend the trek fighting the basics instead of enjoying the views.
If you want a tight volcano experience that still feels authentic and not rushed, this 2D/1N crater rim setup is a strong choice.
FAQ
What time does the trek start?
The start time is listed as 7:00 am, with the day’s walking beginning around 7:30–8:00 am at the first registration point in Senaru.
Is this trek private or shared?
It’s a private tour/activity, meaning only your group participates.
What’s included in the price?
The package includes overnight accommodation, all trekking equipment (including tent, sleeping bag, camping pillow, camping chair and table, toilet tent, and sleeping mat), food and drink (including breakfast, lunch, dinner, snacks, coffee/tea, bottled water, and alcoholic beverages), plus a local guide and porter and pick up and transfer.
What should I bring that’s not included?
You should plan to bring a head lamp/hand torch, trekking shoes, long pants/trousers, and a trekking jacket (and other personal trekking items like sun protection and insect repellent).
Are additional porters available for personal luggage?
Yes. An extra porter for your own luggage is available for $22/day.
Is there free cancellation?
Yes. You can cancel up to 24 hours in advance for a full refund. If you cancel less than 24 hours before the start time, the amount paid isn’t refunded.